Photo Credit: Screenshot via Querlo.com
Hello, guys!
As I was absent from this network for a few months the moment I decided to come back I noticed there are lots of new things going on. New home page, new requirements about posting content, changed and improved rules. But most importantly - the introducing of the chatbot Querlo. I know there was a contest about writing blogs and making videos/chats about Querlo because I checked Micky's profile to learn more information about the recent news. Even though these are not happening currently, I believe they expired a few weeks back, I want to add my share of experience with using Querlo. I hope you enjoy it.

Photo Credit: Querlo via LinkedIn.com
What is Querlo?
Querlo is an interactive chat with a customizable API that can be implemented on any website, mobile app and social media platform, offering an easy-to-use 24/7 interface. Data is collected and documented in Real Time.
Querlo, as we all know, is 'a chatbot with a human touch'. It is innovative, it's unique, it's an opportunity for businesses to stay informed regarding their customers' preferences, develop and grow. Using Querlo is not only beneficial to the provider of a product or a service. It is also pleasant to use by the end user/consumer. It provides an interactive interface where users can enjoy and learn more about a topic, a product or whatever the main target of a company or an individual is. It wouldn't be strong to say that Querlo is the next step in communicating between a website or an app and a human.
Video Credit: Sky High Advertising via YouTube.com
Why does Querlo have a human touch? I'm sure different users perceive this chatbot in different ways - after all, our reactions to the world and to technology are not the same. But using an innovation like this is always exciting, and most importantly - intuitive. Querlo guides you through the whole conversation and can be customized to provide the most relevant information based on the answer he gets. That way he gives the best possible solution for both the customer and the business.
Here is a Querlo chat of how Querlo explains itself:
Chat Credit: Querlo via Querlo.com
How to use Querlo?
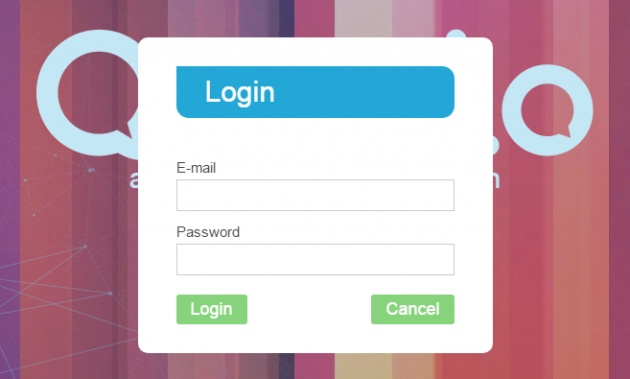
Photo Credit: Screenshot via Querlo.com
The results a company gets by using Querlo can be very individual. And in this blog, I want to focus mainly on using this chatbot and actually creating a chatbox using Querlo. The first step is to visit the official website www.querlo.com and log in using your bitLanders credentials. Both websites - bitLanders and Querlo have the same login information. Once logged in you will have access to your Projects and all available options to create a chat.
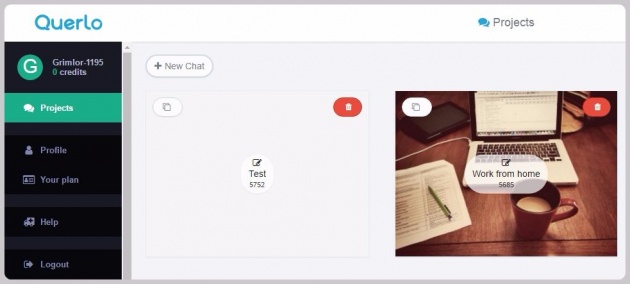
Photo Credit: Screenshot via Querlo.com (edited by me)
Once in the Admin panel of the Querlo website, you will immediately see the option New Chat on your dashboard. This gives you the opportunity to start the process of creating the chat. After clicking this button two windows appear - one with the settings you can choose for your chat called Chat Customization, and a smaller preview window on its right.
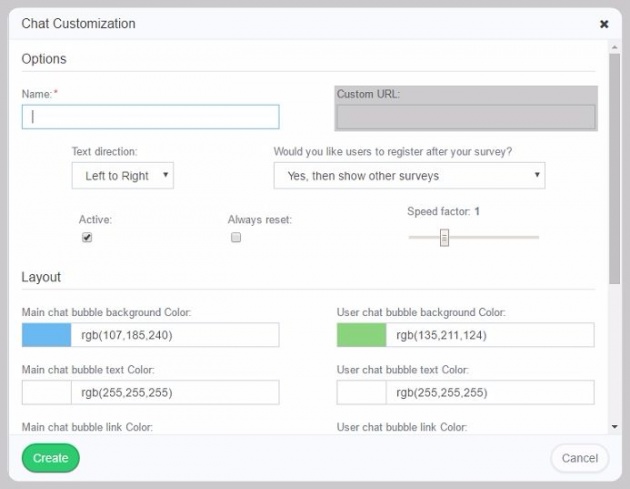
Photo Credit: Screenshot via Querlo.com (edited by me)
Here are the steps to create a Querlo chat:
1. Choose a Name or a title for the chat. This is a required field and is needed for the saving of your project and referring to it after, whenever you decide to embed it on a website.
2. Choose Text direction (Left to Right or Right to Left), and whether you'd like the users to register after they finish the chat. Then you have an option regarding the speed of the text flow, reset and making the chat public option. These are pretty straightforward as you'll notice there is a title popping up when you hover over them to guide you through the process.
3. The next step is to choose the desired colors for each element of the chat window. This includes the text color, the background of the text, the links, the box, and the bars, with the option to choose different colors for the user and for Querlo's speech. You also have the option to add a relevant background image here, which makes your chat appear more realistic.
It's very important to choose suitable colors, as those can directly affect the way the chat is perceived and whether users will enjoy it or not. For example, text and background should be in such colors that what's in the bubble is readable without any extra effort. It could also be a good idea to use a certain color and different tones of it or add colors that fit with each other and are pleasant for the eye. Once you start choosing the colors you will also notice a transparency option on the right - how solid or transparent a given color is. This makes the chat looks fancy, so it's a good investment for your time to play a bit with the amount of transparency for the colors.
How to create a Querlo Chat

Photo Credit: Screenshot via Querlo.com (edited by me)
Now that all is done you can click the Create button in the bottom left corner of the Chat Customization window, which will take you to the next set of tasks for the creation of your chat. Here is where actually the chat questions and answers are created. To start, just click on the bubble on the screen and choose an option from the menu that pops up. The options are as follows:
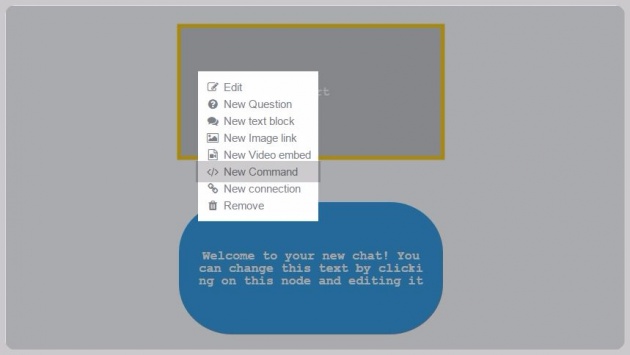
Photo Credit: Screenshot via Querlo.com (edited by me)
- You can create text blocks to give more information to the users or explain about a product or feature.
- You can add questions to request further information from the users and provide them with relevant information based on their answers. Then you can insert the best answers they can choose from to reply to you, in a way that makes them feel comfortable.
- You can add images, GIF files, or embed videos to make the chat even more attractive and informative. Images help for clarifying an idea and could be a great addition to the text. GIFs and videos can make the chat lively and fun.
- You can edit your chat at any point by clicking on the bubble you want to change ==> then Edit.
- You can create or break connections (by clicking on the connection and then Break connection) between bubbles. If you break a connection and the bubble is not linked to anywhere, then it becomes part of the section Orphaned Branches until you link it to another section.
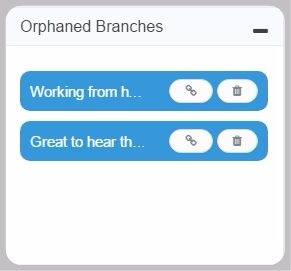
Photo Credit: Screenshot via Querlo.com (edited by me)
I find the Break connection option particularly useful. If at some point you decide to modify the chat or you forgot to add something, you can easily insert it at the point you wish to. This way you don't have to delete everything to that point and re-do it but simply break, add and connect again. Another fun part is the option to add emojis to the questions, the text blocks or the answers. This could contribute for additional interactivity and could be very useful in certain situations.
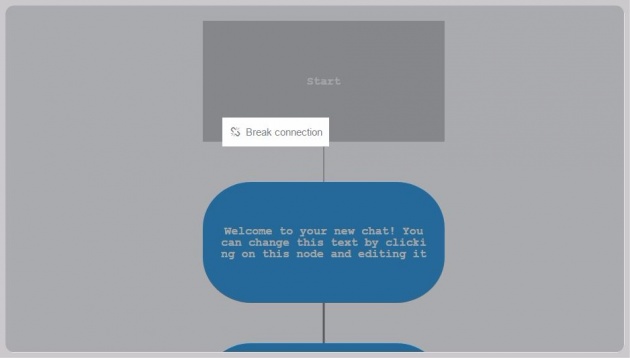
Photo Credit: Screenshot via Querlo.com (edited by me)
And don't forget to use the Preview button on the top right to check if things look as expected. It is helpful if you're not sure of the colors, for example, or how things will look after publishing. Really useful!
Once the chat is ready to be published, you can use the Share button at the top to generate an embed link, which can be used to add the chat to your website or app. You have the options to send a link to someone you'd like to share with, use the embed code (the one inside the <iframe> tags) or change the size to a more suitable for you (width and height).

Photo Credit: Screenshot via Querlo.com (edited by me)
And with this, I hope I managed to cover all the important steps and features in the creation of a Querlo chat. Hope this blog was useful.
Thanks for reading! See you later!
- NinaB