Hey there friends! I have been working a lot during the weekend with developing my Photoshop skills as well as my writing skills. But since I find myself so consumed with writing blogs, I figured I wanted to share how I make a customized banner or header using Photoshop.
Image Source: Designed by Jennai for Bitlanders
I know you guys think it’s easy. Everyone can make a banner design even with just using a Microsoft tool like Paint if that's still up today or powerpoint or maybe in a Microsoft word, but using a design tool like Photoshop can add up to any banner's uniqueness thus making the design one of a kind.
In this blog, I want to share with you how banner or header designs are done using my own personal style as well as the things I consider when making one.
Considering the purpose
First thing I needed to consider when planning on making a banner or header design is the purpose. What's the purpose of my banner? The information that needs to be reflected in the banner.
Honestly, I've just read that somewhere on the web, having a purpose in making a banner makes it more powerful especially when advertising a certain product or service. Information must be cleared and easy to understand. As I have done with my previous banners which I made to sell my Photoshop skills, very powerful and effective.
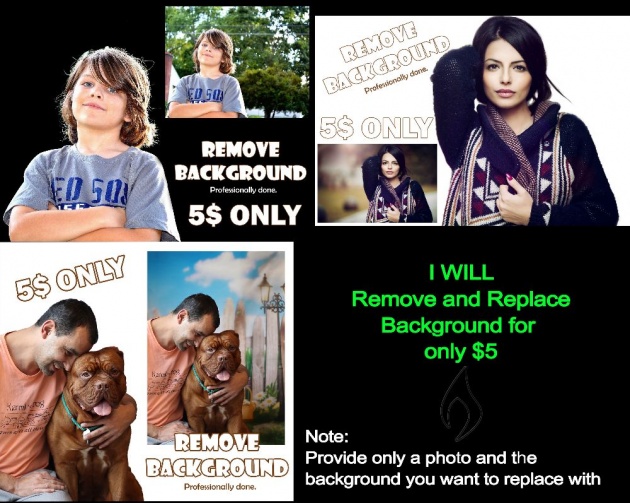
Image Source: Jennz Photoshop Services
Meanwhile, some of my friends at Deviantart get surprised every time I make a header design for them with their name on it which they can use to attach whenever they make comments on somebody else's artwork, pretty neat huh?! They can use those headers as their own personalized signature in their comment box at Deviantart.

Image Source: Screenshot by Jennaikikz of DeviantArt
So now that I have set my purpose and planned my design, the next thing I would do is start making a header design. I will be showing to you guys the pieces of stuff I use to make a simple fire and glow name header for a friend which I myself made.
Making Customized Banner or Header Design with Photoshop
After the planning stage, starting the banner or header design is next. First thing I did was type in a text or name on my banner template. I did have difficulty in choosing the right font though. Here I have my friends' name "LustofADeeperPain".
Typing a Text in Photoshop CC
I used my own style in making this banner because this was intended as a gift for her so I can surprise her, anyway, so after typing her name on my Photoshop header template, I used my own customized Photoshop Action again to get the fire effect on her name.
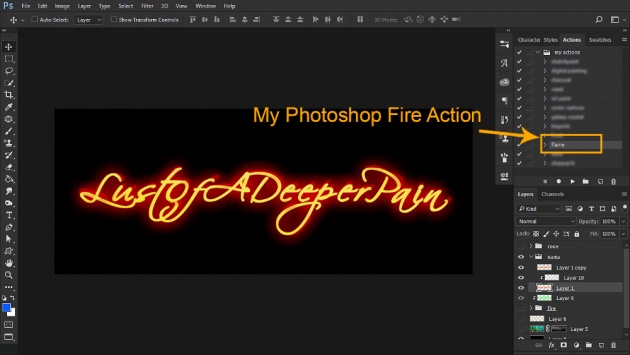
Image Source: Screenshot by Jennai of Bitlanders
Making Adjustment with Photoshop CC
After rendering the effects on the text I made. I've decided to apply a little adjustment with the effects like changing the blending mode so I can intensify the color of the text.
This is one best thing I find to be very powerful about Photoshop. I can always manipulate any work I do with this design tool until I get what I want. Just the perfect design tool for me; Photoshop.
Adding Stock Photos
So after making adjustments with the text, I've decided to add up a little bit of effect again but this time I used some of my collected stock photos.
Since I used my fire effect on this design, I figured it would give justice to the text if I add fire on it (as seen below).
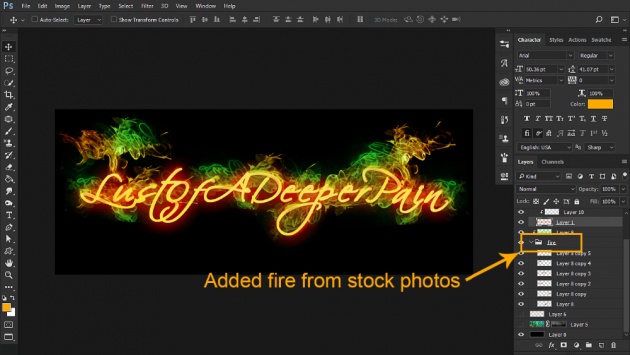
Image Source: Screenshot by Jennai of Bitlanders
And then I've added a flaming rose which I manipulated from an ordinary rose stock photo I got from pixabay.com (see before and after effect)
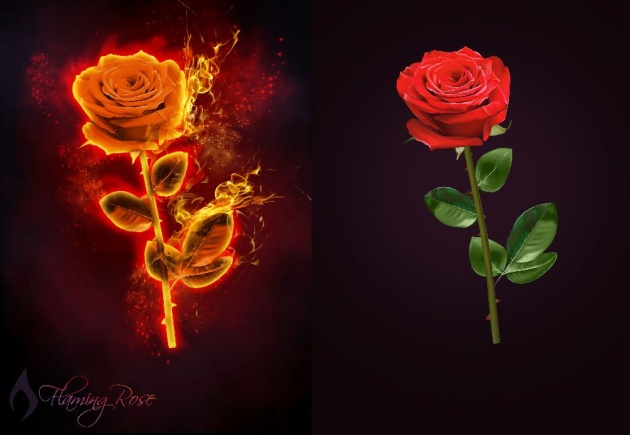
Image Source: Pixabay.com
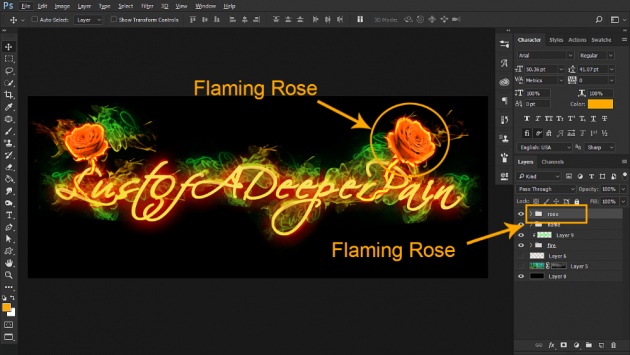
Image Source: Screenshot by Jennai of Bitlanders
Adding Sparkles
Then after adding stocks and adjustments, to spice up the header design a little, I have decided to add a sparkle effect using my customized brush tool (as seen below).
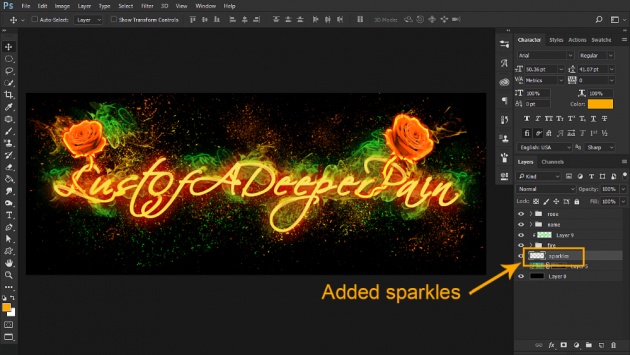
Image Source: Screenshot by Jennai of Bitlanders
Adding Background
After seeing my artwork on a black background, again I've realized that the header should have a different yet dimmer background so as to intensify my design.
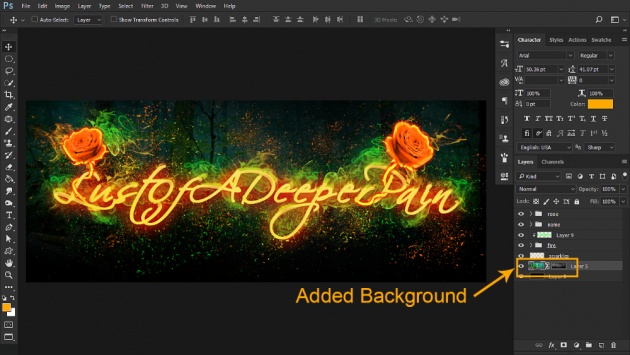
Image Source: Screenshot by Jennai of Bitlanders
I always love adding a background to my artworks.
Adding Glow
And then the next step I did was add a glow to my background. I chose to use a green and orange mix on it as I loved how it compliments my background behind the text I made.
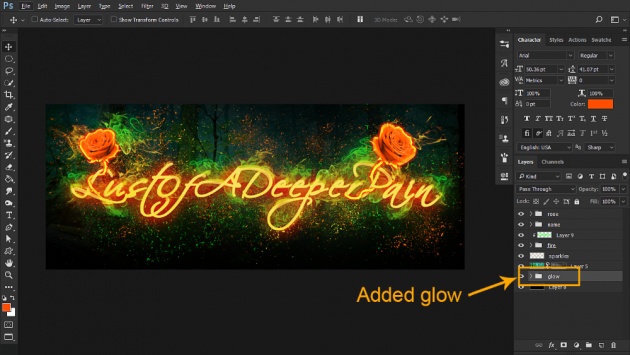
Image Source: Screenshot by Jennai of Bitlanders
Just when I think I'm done, I took a final look. I saved the header design in a jpg. format and then I opened the file again and intensified the clarity of my brand new stock photo, slash header.
I also have here samples of my banners with my logo on it. I'm still building my website at the same time while getting consistent on submitting blogs and videos here at Bitlanders despite my busy work on weekdays.
Anyway, to summarize everything I did, in making a banner or header design with Photoshop, one should never forget the purpose. Here are the steps I've developed using my very own style in Photoshop.
#1 Typing a Text in Photoshop CC
#2 Making Adjustment with Photoshop CC
#3 Adding Stock Photos
#4 Adding Background
#5 Adding Glow
There you go guys, another one of my Photoshop journey, "How to Create a Customized Banner or Header Design with Photoshop CC".
Video Source: Jennai of Bitlanders
I've been developing my official blog site with blogger and as a beginner, banner designing, as well as header designing, is a must. I mean, I know I am far from getting there but who knows, this might just be the beginning. Although I haven't really been actively online during the weekdays, with proper time management, maybe I can make something happen. As the saying goes,
"Without hard work, nothing grows but weeds."
-Gordon B. Hinckley
Until then, you can check out some of my blogs about my hobbies:
Developing a Hobby: Succulents are Awesome
How to Use Photoshop Actions with Photoshop CC
My Online Shopping Experience and How to be a Good Online Shopper
Making GIF (Graphics Interchange Format): A Web Animation with Photoshop CC
Making Customized Mug Design with Photoshop CC
How to Create Customized Photoshop Layer Style: Gold Text Effect
Drafting Civil Engineering Works: AutoCAD versus Hand Drafting
How to Make Your Own Customized Photoshop Shortcut Keys with Photoshop CC
Thank you for visiting. Here is another Querlo Chat for you :-)