Hello, Bitlanders. We often love to share our desktop screen here in bitLanders. Some have also shared their short tutorials not only here but also on YouTube and other sites. The question is, how do you capture or record your screen?
I have seen some members record their screens using smartphones or digital cameras. Perhaps that's a quick solution perhaps. However, there are several free screen recording software available for Windows and Mac. For Android, there are also several apps available on the Play store.

Image Credit: Edited using Pixteller by @artbytes for bitLanders
Advantages of Using Screen Recorders
Using screen recorders have at least two advantages over using digital cameras or phones.
- Convenience - as far as I have experienced, it is not quite easy to upload a video to Bitlanders from a phone. You need to switch to the desktop mode that makes it more difficult to navigate on a small screen. With a screen recorder, you can easily upload the video right after recording it.
- Quality of Video. - the quality of the video using a screen recorder is far superior to using a phone or camera. The light from the monitor will always affect the quality of the video.
Since I got my laptop, I made sure to use a screen recorder or two to record some of my activities here in Bitlanders like the one I uploaded on July 15.
This video was recorded using the Windows 10 Game Bar
Video Credit: @artbytes via Bitlanders
Du Recorder for Android
As some of you already know, I had been using my Android tablet and phone on my activities here in bitLanders (read: Blogging with less than $200.00 Equipment). For months, I had been using my phone to record my daily earnings, and the blog review results in Bitlanders. I have installed Du Recorder on my phone and had been using the free app ever since. Unfortunately, Du Recorder is not fully compatible with my 10.1-inch tablet.
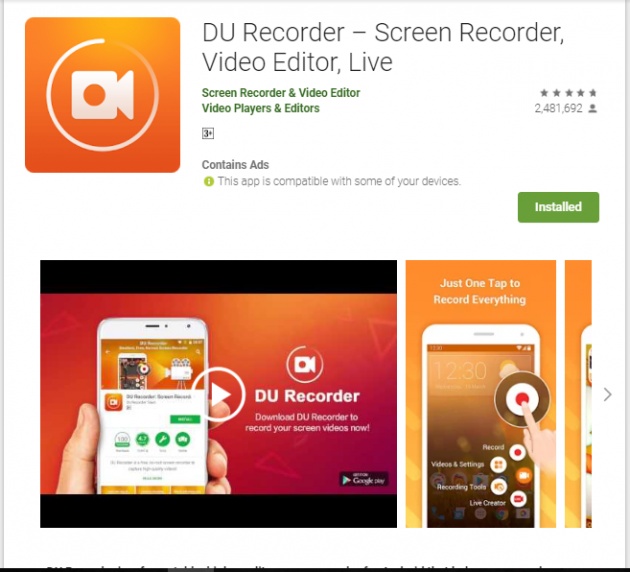
Du Recorder
Screenshot by @artbytes. Source: play.google.com
DU Recorder is a free, stable, high-quality screen recorder for Android that helps you record smooth and clear screen videos. With a variety of features such as screen capture, video recorder, video editor and no rooting needed, DU Recorder provides an easy way to record screen videos, like game videos, video calls, live shows, and more - making everything simple!
-Source: play.google.com
Du Recorder is very easy to use. Just tap on the red 'Record Button' and do your activities on your phone and they will be recorded. As described above, it can also be used to take a screen capture. One feature that I love about DU Recorder is it comes with a video editor, With the video editor, you can trim, cut, and even join videos. You can also add music, intro, and outro text and even subtitles, plus a few more features.
Free Screen Recorders for Windows
Fortunately, there are a number of free screen recorders for Windows and Mac Operating Systems.
CamStudio
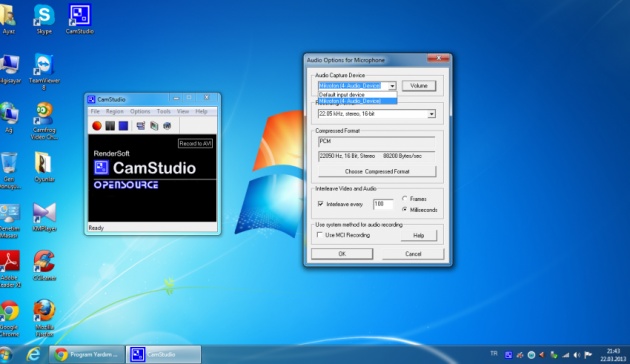
Cam Studio
Image Source: http://ayhankorkmaz.net/camstudio-ile-calismalarinizi-kaydedin/
In my old laptop, I was using an opensource program named CamStudio (camstudio.org). It was a good program and worked well for me. However, the latest update was released on October 26, 2013. I'm not quite sure if it will work well on Windows 10.
However, if you are using Windows 8.0 or Windows 7, CamStudio is a great free screen recording program. One thing I like about CamStudio is, the mouse pointer is highlighted and every time the left button is clicked, the color changes. CamStudio is a great program for creating tutorials.
Windows 10 Game Bar
Unknown perhaps to most users, but Windows 10 comes with a 'hidden' screen recorder. Game Bar is designed for gamers to record and even broadcast their plays. However, Game Bar does not appear on the list of programs or apps from the main Windows Menu. Even if you search for Game Bar, the search result will only show 'Xbox' as the best match. Technically, the Game Bar is part of the Xbox app.
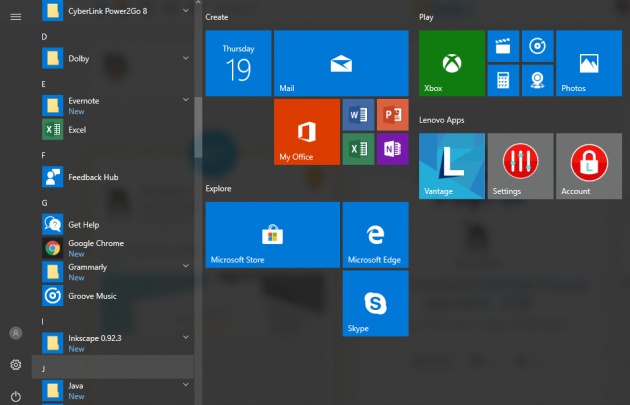
Game Bar is not found on the program list of Windows 10.
Screenshot by @artbytes
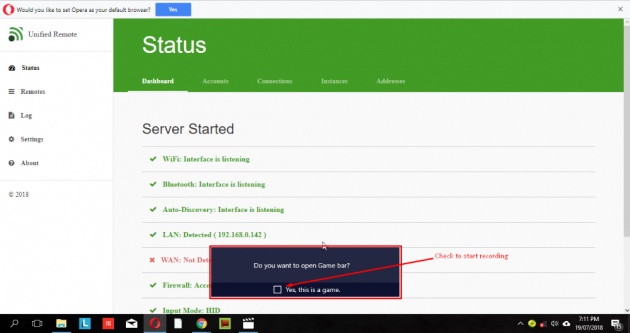
To start Game Bar, just press the Windows key and G (Windows+G) together. then the Game Bar controller will pop-up. The Game Bar will record the window that was active when you pressed Windows+G. If it is the first time you activated the game recorder on any app or program, a pop-up will ask you if you want to open game bar. There is just one checkbox at the bottom that says 'Yes, this is a game.'
 Game bar
Image Credit: screenshot by @artbytes
Afterward, all you need to do is hit the record button (the big red circle) or press the 'Win+Alt+R' keys to start recording. To stop recording just hit 'Win+Alt+R' again.

Hit the big red button to start recording.
Screenshot by @artbytes
Free Screen Recorders for Windows and Mac
There are a number of free screen recorders that have versions for both Windows and Mac computers. According to the article, The Best Free Screen Recorder by TechRadar, the best free screen recorder that is available for both Windows and MacOS is OBS Studio. However, OBS Studio is not quite easy to setup when you use it for the first time.
Since my intention for this post is give options to the non-techies when it comes to recording their screen, I skipped this software for the moment. However, I will try this software in the near future. For the meantime, I opted to try TinyTake instead.
TinyTake
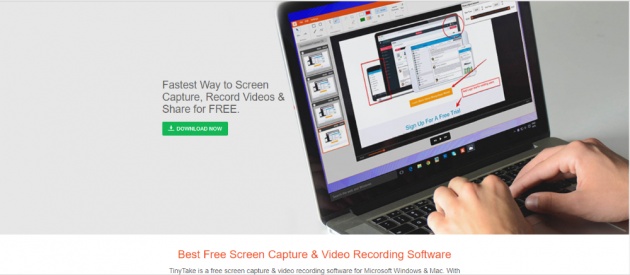
Screenshot of TinyTake web page graphics
Screenshot by @artbytes
TinyTake indeed is very easy to use. The installer is merely 22.4 MB in size. When installing though, your anti-virus might block it several times. I am currently using 360Total Security and asked for confirmation from me several times. After installing it though, you can start recording with a few taps on the keyboard.
How to record your screen with TinyTake
- To start recording your screen with TinyTake, press Alt-V.
- Select the region of the screen you want to record.
- Press Ctrl-R after you have selected the region to start recording.
- To stop recording, simply click the 'Finish' button.
You have three options to save your recording.
- On their cloud server, in which you have 2GB of free storage space;
- offline, or your own disk, and
- upload directly to YouTube
The free version of TinyTake has a 5-minute limit on the recording time. For me though, a five-minute recording is more than enough.
Free Screen Recorder on Chrome Extension
Nimbus Screenshot and Screen Video Recorder
There are Google Chrome Browser Extensions that designed to record not just the browser tab but also the desktop. I have a tried one of these freemium extensions but there is a thirty-second limitation on the free version. Nimbus screenshot and screen video recorder, however, does not have that limitation.
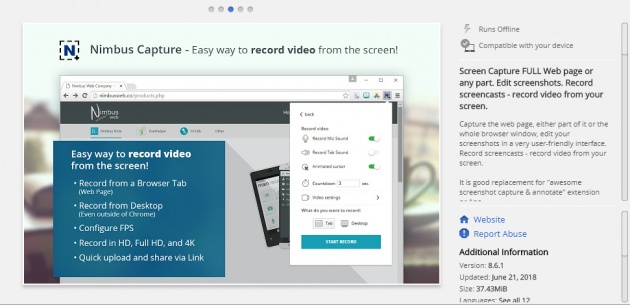
Screenshot by @artbytes
Once active on your Chrome Browser, you can easily access the menu from the extension shortcut at the top-right of your browser, or you can press any of the keyboard shortcuts (Ctrl-Shift-7 to record the current tab and Ctrl-Shift-8 to record the desktop).
To stop the recording, all you need to do is press Ctrl-Shift-9 on your keyboard. Once you have stopped the recording, a new tab will open with your recording. You have four options where to save your file.
- Nimbus cloud storage
- Local drive
- Google Drive (Pro account only)
- YouTube. (Pro account only)
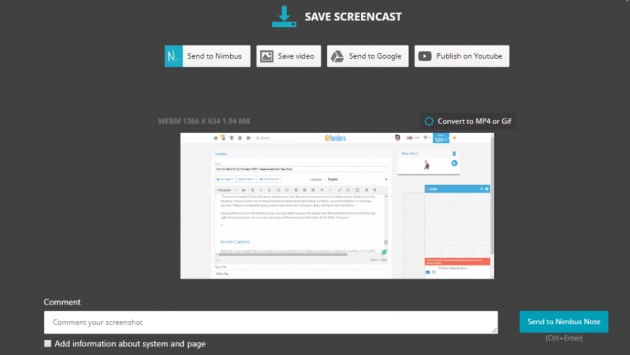
Screenshot by @artbytes
Unfortunately, with a free account, you can only save your recording in WEBM format. You need to have a pro account if you want to convert your file to MP4 or GIF formats. However, I found a workaround for this limitation. I use Convertio online file converter (https://convertio.co/) to convert the WEBM format to MP4 for free.
How To Use Nimbus Screen Recorder
Here is a short video showing how to use the Nimbus Screen Recorder. This video was recorded using TinyTake.
Video Credit: @artbytes via Bitlanders
Screen Capture with Lightshot
Before I close I would like to mention a very useful tool for taking screenshots. Lightshot modifies the PrntSC or Print Screen key. once Lightshot is installed, pressing the Print Screen Key will start Lightshot. With this tool, you can select the area you want to capture. Then you can add annotation and do some editing before saving it directly to disk or to the clipboard.
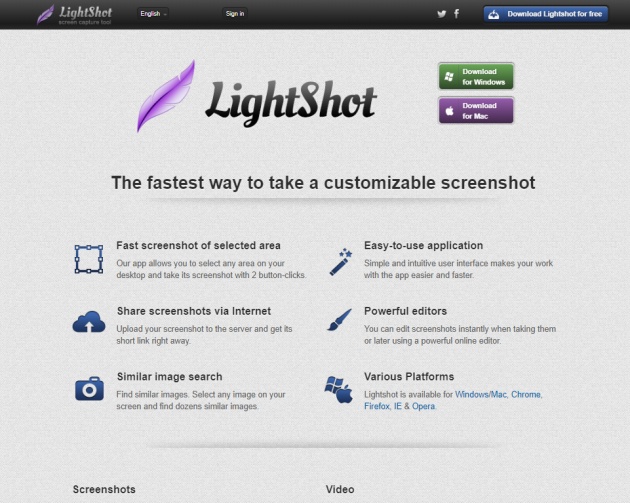
Screenshot by @artbytes
All of the screenshots here are taken using Lightshot.
Please Comment and Share
This is it for now Bitlanders. If you find this post very useful, please let me know in words in the comment below and share with your followers as well.
Thanks for reading