In this post, I'll detail how I went about transforming the old man to a little girl (poor old man :( ). In the film, she will be playing the role of Uyir's sweet granddaughter and her character will be quite significant in the film. Thus, I needed to ensure that I also put in a good amount of effort to make her look as detailed as possible. I could have simply just started from scratch but that would have taken another month (as that's how long the old man took). Especially considering I would have to do all the modelling again, texturing, re-define the same shape keys, rig, etc, I would have likely lost motivation. I was looking for a solution to minimise effort and maximise output and I found out how to do it in Blender! The solution simply involves transforming the old man into the granddaughter thereby preserving the shape keys, rig and skin/eye shader. All I had to change was the skin texture, eye colour and proportions of the body.

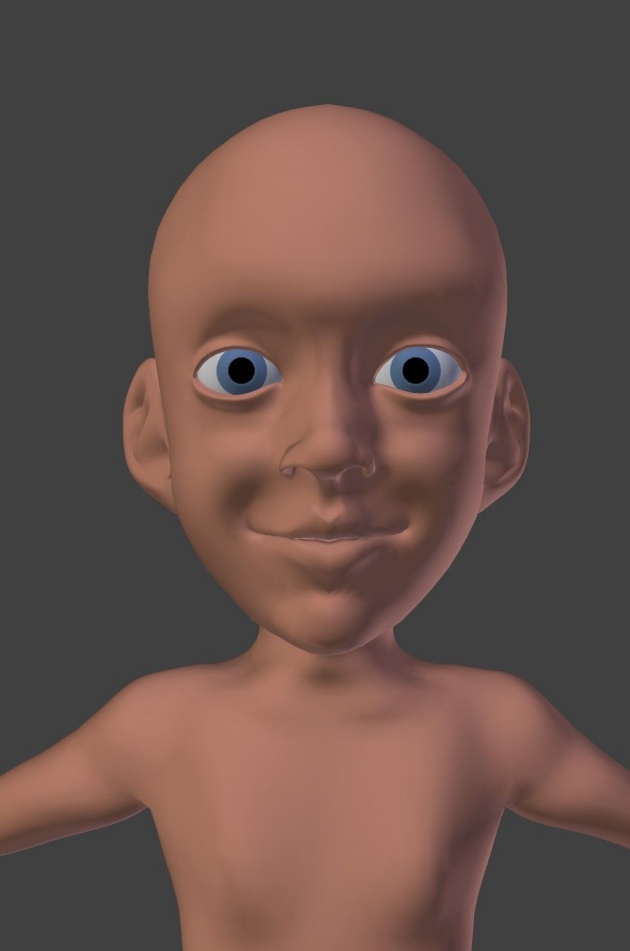
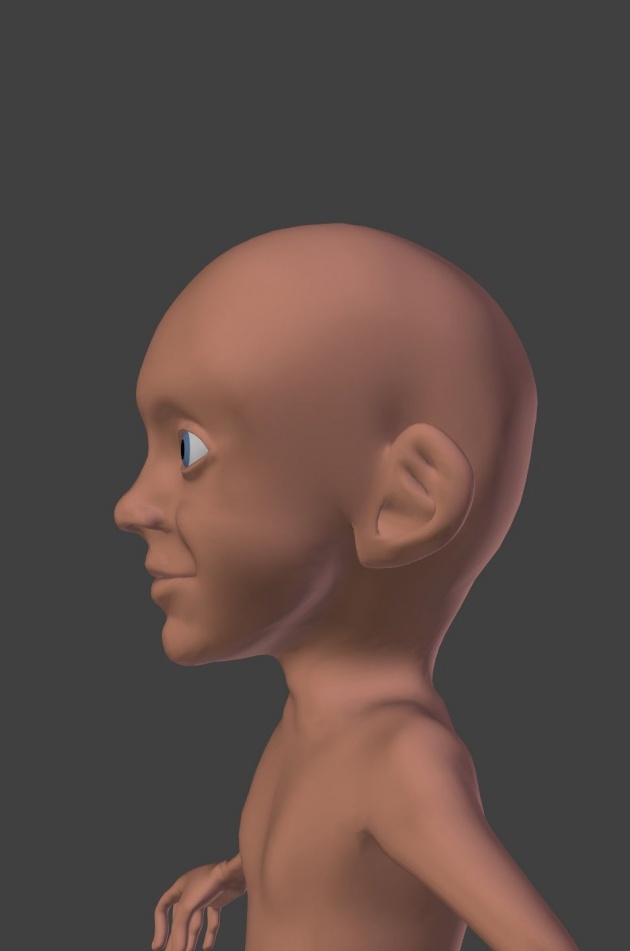
First things first, I removed hair, moustache and beard (as that would be very strange for a little girl..). I then started to modify the proportions of the body. So things like scaling down the chin and mouth and applying some smoothing to make it look 'petite'. The nose was scaled down and made smaller and more smooth. Her ears were also made significantly smaller. I only recently learned most children do not have sharp, defined noses. The shoulders were scaled down and had a length just larger than the width of the head. The arms and legs were also scaled down and made a lot thinner. I didn't worry too much about detailing the body since she will be covered by a dress but I needed to ensure the proportions were right since cloth simulation will be interacting with the body. I made sure that her head was large, as a smaller head size is more suitable for adult-type models. Many times, I've seen newer modellers trying to model children by taking a generic adult model and scaling it down to the size of children. The reason why it still looked like an adult, apart from the muscles, is largely due to the small head size. A bigger head and smaller legs generally indicate the proportions of children. Exaggerating this effect will give more the look of a toddler. (Just a note, when modifying proportions in Blender, make sure the shape key is set to 'Basis' or your changes will affect other shape keys like 'Smile' for instance.)
One of the most challenging aspects in getting right was the eyes. The eyes are generally represent the soul of the character, and it was important I got this right but I didn't know how to convert an old man's eyes to a young girl's. After some research, I found the shape of female adult eyes to be not that much different to male adult eyes. The only difference I found was females had thicker eyelashes and extend outwards more. I incorporated a bit of this in the model and made her eyes bigger to give a more cute and younger look. Even for my final version, I don't feel like I've nailed it yet but I just went with what I had since I was spending too long re-shaping and frustrating myself. I just can't seem to get eyes right :/
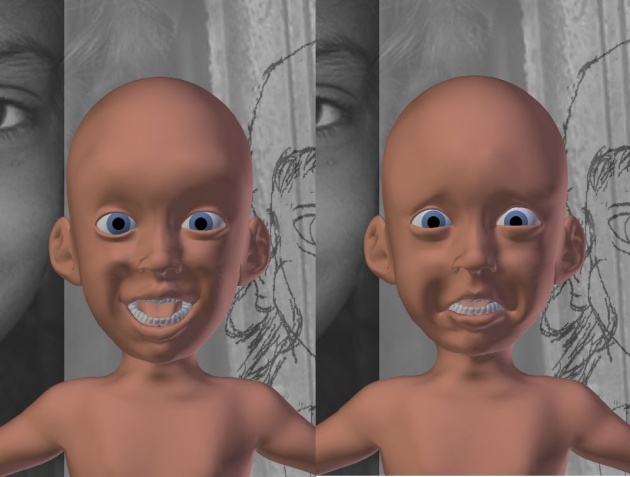
One of the most nervous aspects of transforming this character was ensuring that the facial expressions stayed intact. Luckily, it did. As long as I modified the proportions using the 'Basis' shape key in Blender, all the other shape keys such as Smile, Frown, Eyelid open/close, Eyebrow angry, etc, would not be affected that much. Basically, the old man's expressions seamlessly transferred to the daughter. I did get a couple of issues here and there, but all I had to do is delete that shape key and quickly re-do it. Here are the facial expressions made with minimal effort:
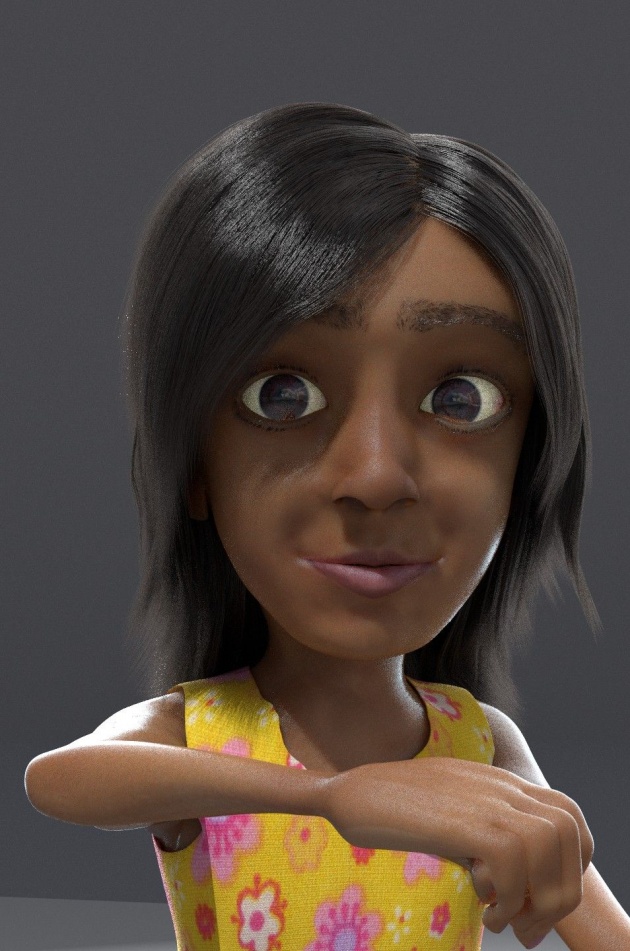
I also had to re-texture her face and used face portraits of various children to clone and paint over the mesh. This realistic texture replaced the realistic texture used for the old man. The stylistic painting texture still remained the same and was mixed with this new texture to give a semi-realistic texture of the young girl. The shader for the skin remained the same. The eyes shader remained the same but I added a Hue/Saturation/Value node to change the eye colour.
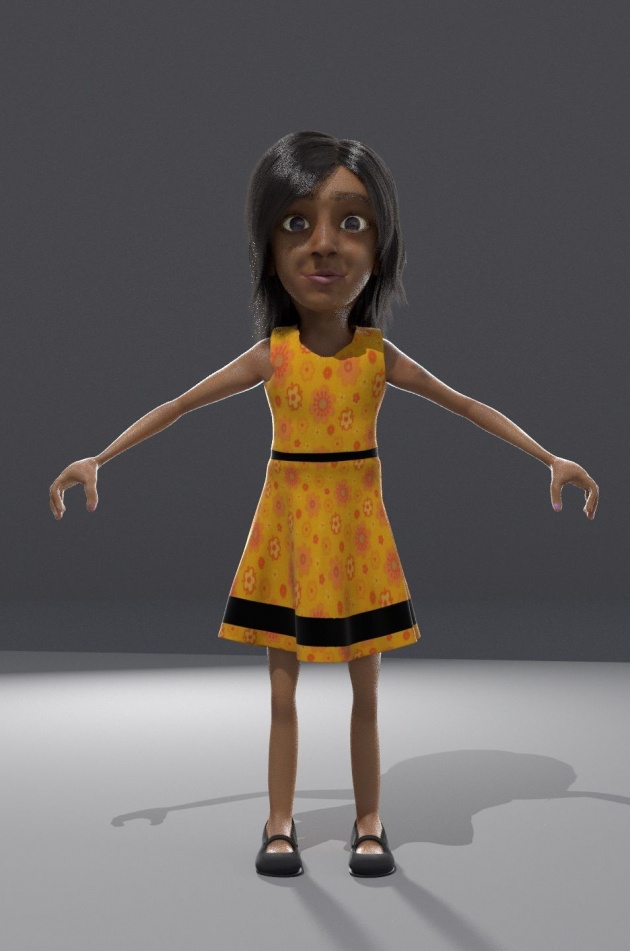
Here is how the render ended up looking:
Next, I tested the rig. This also transferred smoothly from the old man. I did scale down the whole model to the size of an 8-10 year old. This did not reflect in the rig. All I had to do was use the base rig in rigify and move/scale/rotate the bones to fit the newly scaled model. I then re-generate the rig with the correct proportions. Also in Blender, do not parent the new rig using 'automatic weights'. This will rig the model again with new weights and you would have to go in and tweak all the weight painting again. Since the weights for each bone has been defined in her mesh, simply add an armature modifier from the modifier stack and select the new rig. It should work and you should see your new model moving again. Here is her deformation test:
I then gave her a dress. This was made by duplicating her mesh and deleting her hands and arms, feet and legs, head and neck. Thus leaving only the body. I extruded downwards to the size of her skirt and added a few loops in between to give more detail. I then painted the skirt area (using vertex groups) to define where the cloth simulation will behave. The rest of the dress will move along with the armature as this part was just a duplicate of the body mesh. I then applied the cloth simulation to the skirt and spent hours tweaking the settings to get the cloth movement I liked. The cloth was UV unwrapped and I added a simple flower pattern using a texture from CGTextures.com. I also painted a yellow dress design that had those black lines across the dress and combined it with the flower texture. Here is a test animation with cloth movement:
To create her hair (as seen in the above render), I divided the hair groups and named them 'left', 'right' and 'back'. The 'back' group had hair particles flowing downwards from the back of her head. The 'left' group had hair particles flowing leftwards with a bit of a fringe from the left side of her head and I made sure the hair particles did not go through her ears. The 'right' hair group similarly had hair particles flowing rightwards from the right side of her face and also combed carefully to make sure the particles do not intersect with the ears. This took me hours and hours to tweak. Getting that cool hairstyle that you have in your mind is sometimes not easy and straightforward to do in Blender and needs lot of hairs of tweaking. It's not that it's hard, you just need a bit of creativity and imagination in this part. A realistic hair in CG requires thousands upon thousands of hair strands. Physically placing those hair strands will create massive pressure on your CPU and graphics card. I used a technique called 'instancing'. To enable Instancing in Blender, you turn on 'Children' particles and set a number you want for the children particles. If I set the number to say 100, then for every strand I add, 100 more strands will be added during render time and will only use around about the same amount of memory as the single strand. I was VERY happy with the result I got from the above render. Especially when comparing my first (embarassing) hair render for a film a few years ago (as seen below). I've learnt a lot since then, lol.

To finish up, I added hair dynamics. The tips of her hair strands had 0 weight and progressively had 100% weight as it moved towards the scalp. What this does, is it makes the hair at the tip sway more freely according to gravity (at 0 weight). At the root of the hair (with 100% weight), the hair doesn't move at all and stays put. Here is an animation with hair dynamics turned on:
The great thing is, the hair and cloth simulation seem to work seamlessly with one another without too much memory and CPU issues. Additionally, this will further help imbue a bit more life in the scene when I render this in the animated film.
That's pretty much it! That ends the character development phase! In the next post, I'll detail the set and environment building.
Subscribe to follow updates on this project, and if you're not registered on BitLanders, register here!
Website: uyirthefilm.weebly.com
BA blog: blenderartists.org/forum/showthread.php?343742-Uyir-Short-Film-WIP