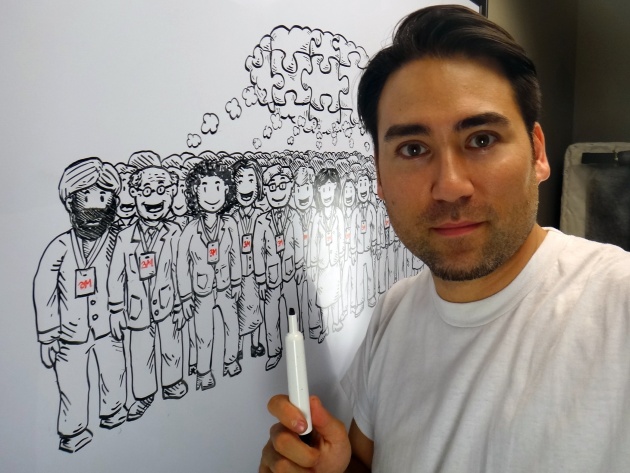
Yesterday, I just wrapped shooting a corporate whiteboard animated video for 3M. It was a full 5-day shoot with 10 hour days. So super intense. When I create whiteboard animations, I do my best to do everything under the camera. This means that I actually draw on a whiteboard and take photos as I draw. For this video, on top of seeing a hand just drawing each illustration, I actually animated some drawings frame by frame using an straight ahead animation technique. So characters are animated to move around the whiteboard and body parts move to help breath some extra life into the video. Not only is this super time consuming, since I have to draw the character hundreds of times in different positions, but it is definitely one of the most challenging methods because there is no ability to trace or reference your last drawing. Sure those things could be cheated digitally in post but that's not my style and personally it just doesn't look as good if they were done under the camera!
Over the last couple years, on top of creating my own independent projects, I’ve also been busy creating various whiteboard videos for clients. I’ve probably done almost a dozen now. Companies love whiteboard videos because they can convey their information in a visual and auditory way. They also refer to these types of videos as visual note taking because you can see the information coming to life through various drawings that correspond to what is being said usually via a voiceover. I like creating whiteboard animated videos because unlike doing other kinds of classical animation, it doesn’t take months to complete but rather sometimes only a few weeks from start to finish.
Before I even start drawing on a whiteboard, I take the voice over and create a rough storyboard for the client to help visualize what’s being said. After some back and forth, I move into cleaned up storyboards that include the client’s feedback and suggestions for revisions. After that, I take the storyboards and create what’s called an ‘animatic’. Basically an ‘animatic’ is a video with the storyboard images timed out to the voice over. This way the client can actually see how the video will look and sound before we start animating.
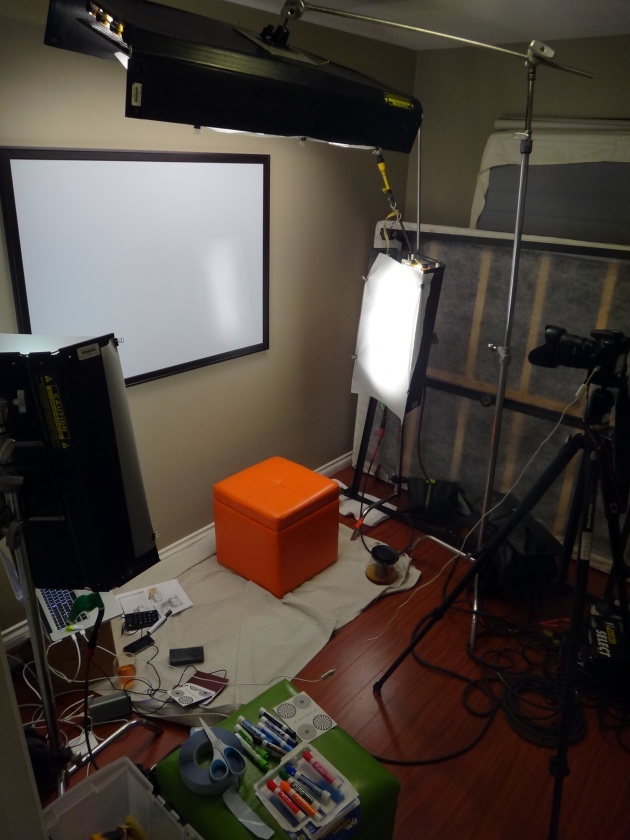
Once the ‘animatic’ is approved, I get the client to sign off on it because once I start animating on a whiteboard, there’s no going back. When I start animating I have to start at the very beginning and work my way to the end chronologically. It’s extremely important to light the whiteboard evenly with absolutely no highlights. If there are highlights, it can wash out some marker lines and that’s not good. I use three kinoflo lights to light the sides and top of the whiteboard. This time I used two 2 foots and one 4 foot. It’s also important to use filters to soften the light. As well, since I'm animating over a series of days it's very important to keep the lighting consistent each time I start animating so I block off all windows.
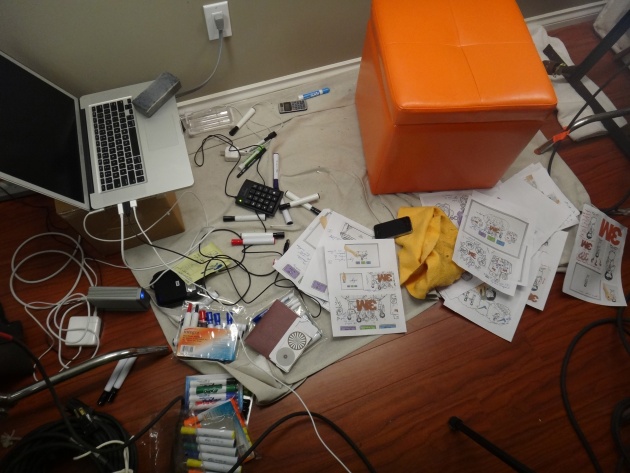
To shoot the animation I use a DSLR with a really sharp prime lens. Depending on the distance from the camera to whiteboard will determine what mm lens I use. All the storyboards are printed out and I make timing notes for me to follow as I animate. It’s pretty much the most physically painful animation I can think of doing. This is because when I shoot my hand coming into frame to draw an image, I have to duck the rest of my body out of the shot. Each time I draw just a little bit more of the image as my hand moves around the whiteboard. It takes 24 photos to make a second, so if you think of making a 3 minute animated video, that’s like doing thousands of crunches as I come up to draw and duck back out to take the photo. Let’s just say after the first few days, it hurts to get out of bed. To animate a 3 minute video, like the one I just did, you need over 4000 photos!
The overall reward obviously is seeing all the drawings come to life after days spent crouched over and drawing under hot lights. As well, it’s really awesome to see and hear it all come together with sound effects and music, bringing it all together into one cohesive and unified piece!
Please subscribe for updates on new blog posts and video uploads and please check out my whiteboard studio reel below and a video of me talking about making whiteboard animations and why they are great tools for conveying information to an audience.