Hello, Bitlanders!! I've been wondering what other things I might share with you. I 'm not really good at writing movie review blogs. LOL. I tried to experiment with my writing, I guess I haven't achieved that much research about how to write a movie review but I do get a better review whenever I write a tutorial or anything that's got something to do with Photoshop. I get it...Photoshop is my niche then.
Image Source: Jennai of Bitlanders
I hope you guys would find this blog interesting. Today I'd like to write about "How to Make a Customized Mug Design".
Making a Customized Mug Design with Photoshop CC
Designing a mug is just one of the many products by which a digital art design can be printed on.
Mug designing can be used in customizing gifts for whatever occasions may it be; for a wedding or birthdays. I tried to make a mug design as a birthday gift for a friend of mine. She was happy when she saw her name on it and I felt glad.
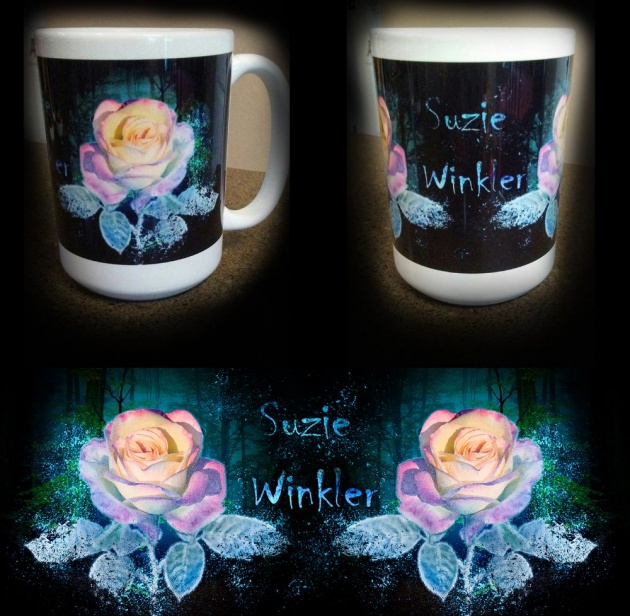
Image Source: Jennai of Bitlanders
I was playing with Photoshop brushes when I came up with an idea of a splattered painted frozen rose flower. First I needed a stock photo.
Search Online for Stock Photos Free for Commercial Use
Unfortunately, I don't own any DSLR camera yet so I needed to find myself a decent stock photo online. There are actually many sites that offer free stock photos. I got mine from pixabay.com. So here is a photo of a rose which I got from that site.
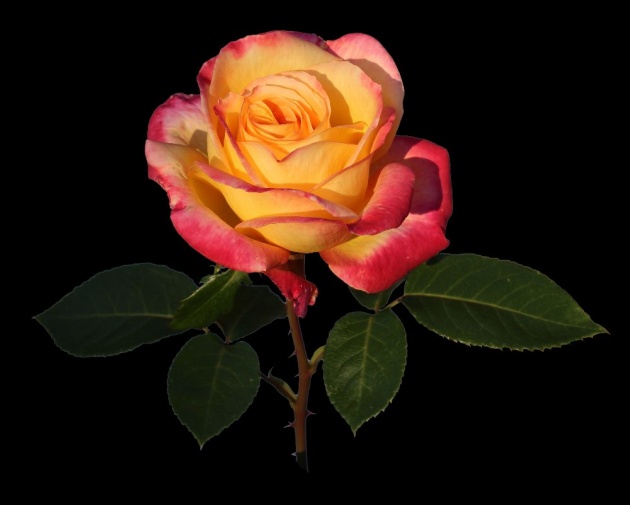
Image Source: Jennai of Bitlanders
I opened the file in Photoshop and experimented with my newly made Frost Effect Photoshop Action.
Photoshop Action: Frost Effect
I clicked the play button to render the effects automatically into the photo and to see what happens when I played it.

Image Source: Jennai of Bitlanders
Video Source: Jennai of Bitlanders
After the frost effect was rendered, I clicked on the "Add layer mask" button located at the lower right corner to create a mask on my "Frost Effect" folder. I did this in order to control the effects I've applied.
Then I clicked on the mask and used a basic brush with zero hardness and set the brush to twenty percent opacity. Setting the opacity is used to control the density of the brush tool. I chose twenty percent so I would have more control over the change I will be making, then I checked the foreground color if it is black, see photo below.
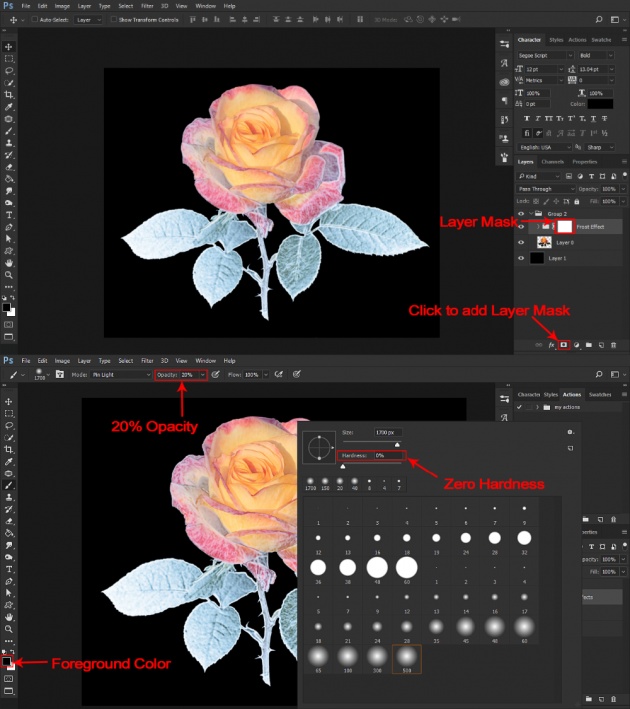
Image Source: Jennai of Bitlanders
Photoshop Layer Mask
Photoshop Layer Mask is interpreted literally like a mask wherein any layer would technically be hidden for photo editing purposes and by using brush tools, pen or paint bucket tools, that hidden layer can be revealed and manipulated in Photoshop.
When a layer mask is white like the ones you see above, it means it is visible. When it is black, then the layer is hidden. It can be visible using many ways like what I usually do wherein I either use a paint bucket tool or a brush tool, but in a layer mask, Photoshop allows only white or black.
Moving on, I have here the rose photo, I have hidden a bit of frost effect I applied to it so as to reveal a portion of its natural color.
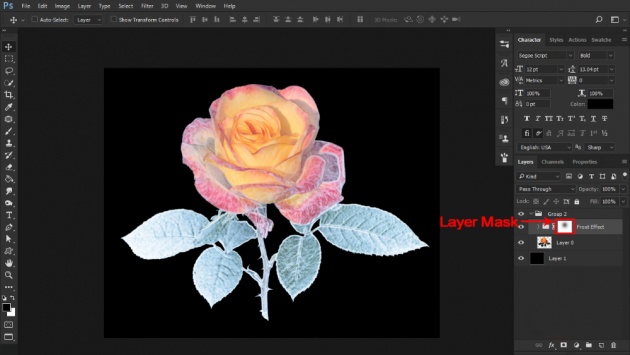
Image Source: Jennai of Bitlanders
Applying Dispersion Effect
Next thing I did was apply a dispersion effect. First, I placed all my layers in a Group and named it "Dispersion" and then I used my splatter brush tool to hide portions of the leaves using the Photoshop mask layer. See the leaves below.
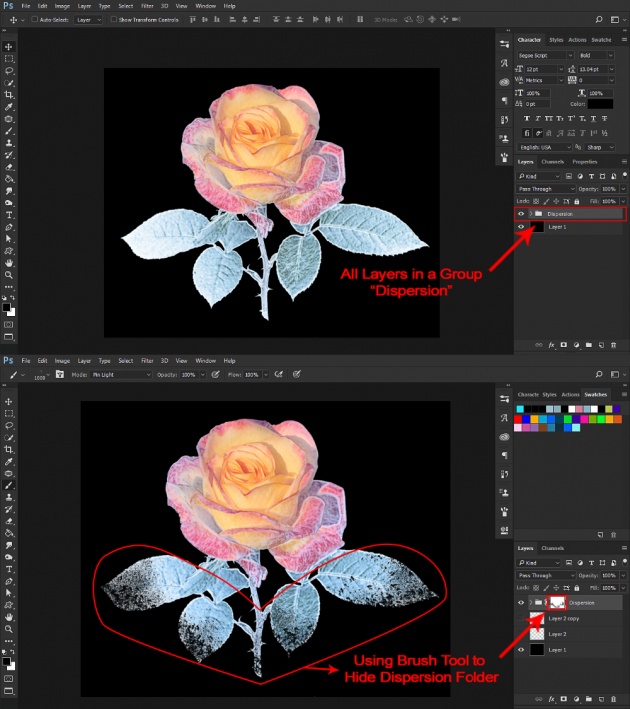
Image Source: Jennai of Bitlanders
Then I added a new Photoshop layer and used my very own special dust brush tool again, this time I did not use the mask layer. And then I chose a color that matches the leaves and patted around the leaves. I made this layer and named it "snow flakes".

Image Source: Jennai of Bitlanders
Now it looks like it’s been spread into pieces as what is known as "Dispersion Effect".
Placing Background
When I finished my dispersion effect, I figured the next thing to do is put a background for the rose since black background seems to be dull.
Since I am working with a bright subject (Frozen Rose), I figured it would then be a good idea to keep the rose and minimize the contrast it creates with the background so I've used the mask tool to make the background look like the rose is glowing on it. See the photo below.
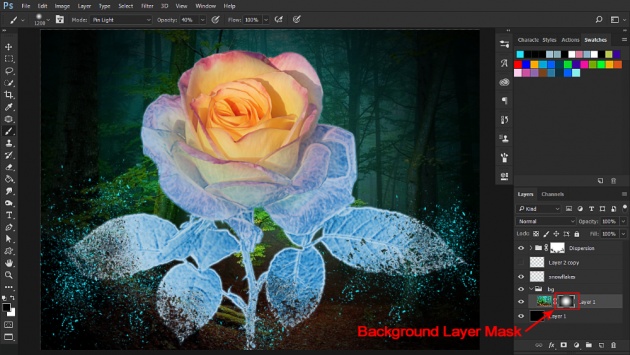
Image Source: Jennai of Bitlanders
The Final Touch
After I applied a background for the rose, I decided I wanted to add more so I used my basic brush tool and put a little blue glow behind the rose to intensify the Frozen Rose. See the before and after photo below.
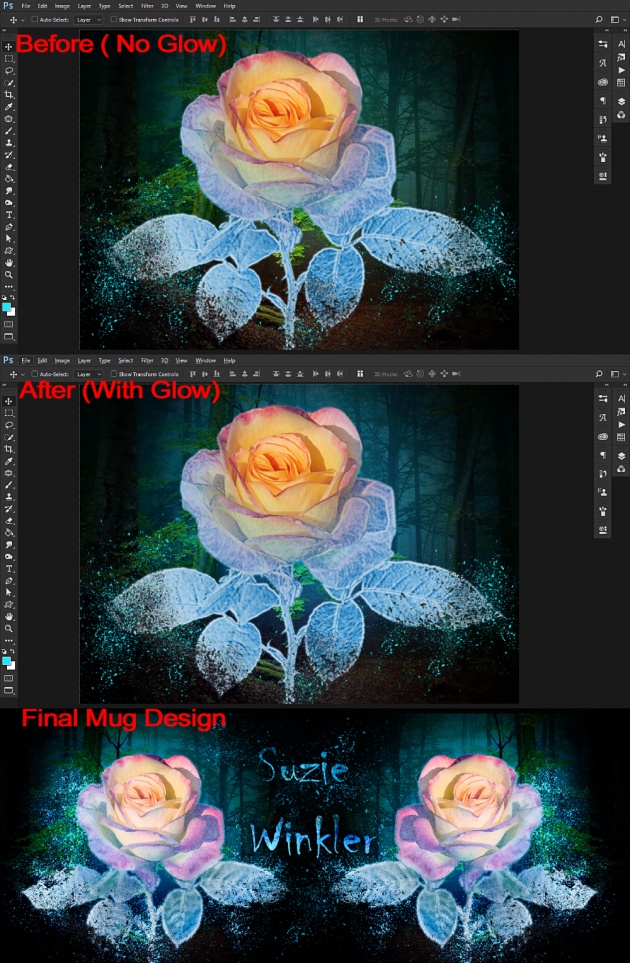
Image Source: Jennai of Bitlanders
Looking at the whole picture, I think I'm done and satisfied with my design so I named it "The Frozen Rose". I dragged this design to a different document size that matches that of the mug and placed a name in between the two frozen rose design and I also added bits of sprinkled blue dust around the name.
Posting the Design
So I posted one mug design for a friend of mine in Deviantart.com. She ordered this design for $9 and I got a commission of $3 for making this, but gaining loyal friends is worth more than just money.
A week after she ordered my mug design, I found out she was actually happy with the quality of the print that she said the photo itself cannot give my mug justice. She actually posted the mug on her page at Deviantart and made credits. I felt happy with what I did and decided I can make another one for her.
Video Source: Jennai of Bitlanders
Making a customized mug design is fun. Hey! If you want one, feel free to contact me at Deviantart, you can send me a note in there. If you’re not a member yet you can sign up for free at deviantart.com. Unfortunately, I'm still working on developing my own website while getting myself busy during the weekend with adding more contents for my blog here at Bitlanders, not to mention, my day job during weekdays is kind of eating my life. I'm exaggerating, I know.
Writing and art have been my escape from my reality. I love the time it takes to finish an article. I enjoy proof reading as well, though I haven't figured out how to do the formatting. LOL.
Maybe someday I'd be able to finish conceptualizing my idea and find time to make my dreams into a reality. Don't worry, I'll get there. Until then, my love for Photoshop will never fade and continue to grow.
If you are willing to do more than you are paid to do, eventually you will be paid to do more than you do.
- Anonymous
I hope you enjoyed reading my blog. Feel free to explore more of my hobbies:
Making GIF (Graphics Interchange Format): A Web Animation with Photoshop CC
My Online Shopping Experience and How to be a Good Online Shopper
How to Use Photoshop Actions with Photoshop CC
Developing a Hobby: Succulents are Awesome
There you go, until then, a Querlo Chat would suffice.