This page contains recipes for several kinds of home-made paper mache paste, and home-made gesso recipes for finishing your sculptures.
I have been messing around with paper mache for over 50 years and up until a few months ago I always came back to the easiest paper mache recipes, using plain old white flour and water paste with torn strips of newspaper.
Now, however, I have abandoned the traditional layered paper process and use my new paper mache clay recipe and/or the even newer silky-smooth air-dry clay recipe for most my sculptures. However, for younger artists or for those who really don’t want to make the trip to the hardware store, these following recipes work just fine, and most of the tutorials on this site would work using these traditional paper mache recipes.
Paper Mache Paste Recipes:
White flour and water make a remarkably strong paste. In fact, some folks think paper mache is strong enough to build houses with. Your finished sculptures might not be strong enough to hold up a house, but you can sand them and drill them, just like wood.
Boiled Flour and Water Paste:
Many people use a paste that is made of white flour and water that has been brought to a boil. I did some experimenting and found that this paste is not as strong as raw paste, so you’ll need more layers of paper to make your finished sculpture stiff enough. However, it does dry clear, so many people prefer it. To make boiled paste, mix a heaping tablespoon of white flour with a cup of water in a small saucepan and stir until there are no lumps. Put the pan on the stove at medium heat and bring to a boil, stirring constantly. Remove from heat and allow to cool. The paste will be very runny at this stage, but it will gell as it cools.
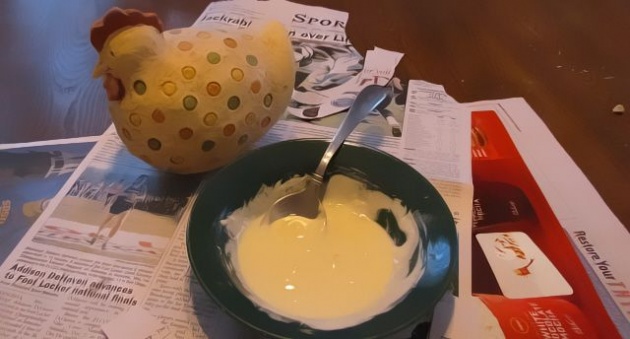
Raw Flour and Water Paste:
This is the paste I almost always use, because it’s stronger than boiled paste and you can complete a project with only a few layers of paper. To make up the paste, just pour some white flour in a bowl, and add water gradually until you have a consistency that will work well. (Use a small kitchen mixer so you don’t have any lumps).
How thick should you make your paste? It’s actually up to you. Experiment with thick pastes that resemble hotcake batter, and thin pastes that are runny and watery. You get to decide which ones you prefer.
Keep in mind that it is the flour, and not the water, that gives strength to your paper mache sculpture. And also remember that each layer of paste and paper that is added to your project must dry completely to keep it from developing mold.
Speaking of mold, why not use wallpaper pastes that contain fungicides? There are two reasons why I choose to use white flour pastes, instead of ingredients that prevent mold. First, white flour is ridiculously cheap when compared to any other type of art supply. And second, I hate the idea of dipping my hands in something that contains poison. If small children were helping me with my projects, this would be even more important.
To prevent the development of mold in your projects, you just need to remember that molds cannot grow without water. Therefore, take every effort to dry out your projects completely. I usually put my small sculptures in a warm oven (not over 200 F) or place them near a radiator. Next summer I intend to build a solar dryer that will be large enough for bigger items. The main trick is to make sure the sculpture is dry all the way through – if any dampness is left inside when you apply paint or other finish, the sculpture will eventually rot from the inside out – a truly disappointing development, I assure you.
Glue-Based paste:
If you don’t want to mess with flour and water, and you don’t mind spending the money for some Elmer’s glue, I found this video for a glue-based paper mache paste that you might want to use instead.
Papers to Use for Paper Mache:
The traditional paper to use for paper mache is newspaper, which is torn into short strips. (Cut edges should be avoided, because they don’t blend in.) Newspaper is cheap, and it is a soft paper that is easy to bend and mold around a sculpture.
However, you can also use brown kraft paper from paper bags, which will give your sculpture a naturally warm color if the piece is left unpainted.
You can also use softer papers, like paper towels and even tissue paper. The softer papers are used to fashion delicate details, and textured paper towels can be used to add an interesting final coat. The paper mache dragon on this site used the bumpiness of paper towels to represent the dragon’s leathery skin.
Gesso Recipes:
Gesso helps to seal the paper mache and provide a nice white ground that makes your paint brighter. You can use acrylic gesso from the art store, or make your own.
Easy Glue and Joint Compound recipe:
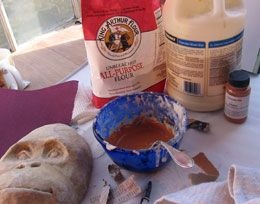
I make my gesso using about 3 parts joint compound, 1 part Elmer’s Glue-All, and some white acrylic paint if I want the gesso nice and white. The paint isn’t really needed. You can apply a coat of this gesso, sand it or use a lightly damp sponge to smooth it out, and then add another layer if the surface still isn’t smooth enough.
Powdered Marble Gesso recipe:
For a thicker home-made gesso, you can use calcium carbonate (powdered marble) and white glue. The traditional proportions are 2 parts PVA glue (Elmer’s or an archival book-binder’s PVA glue if you worry about pH), 4 parts water, and 8 parts calcium carbonate. To make it nice and white, add 1 part powdered titanium or zinc white pigment. If you want to thicken the gesso to cover bumps faster, you can use more powdered marble.
Finishing Your Paper Mache Sculpture:
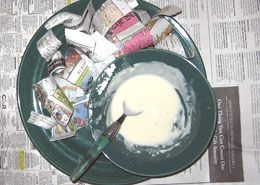
You can use any type of paint on your sculpture. I usually use acrylic craft paints, and a final glaze made from water-based Verathane mixed with a bit of brown, or copper paint from the craft store. This final coat is put on with a brush and then immediately rubbed off with a paper towel, leaving the darker color in the dips and valleys of the sculpture. I happen to like