Hey guys,
Thought I would take a break from my awareness blogs and share something I randomly learnt last week.
I visited the lovely North Wales and decided to attempt a higher quality timelapse using RAW photo's - It was a battle to get my head around but I managed to pull something off eventually!
The difference between RAW and JPEG I learnt was more about image control. RAW photos are kind of like digital negatives...not quite a photo but all the information is there to freely manipulate and make it into one. JPEGS will be processed on capture so your level of image control during the editing stage is reduced -
Depending on how much control/quality you want should determine whether to use JPEG or RAW. (It's recommended to stick to RAW however)
I'm not quite there with photo editing myself but it was useful to learn how to piece together a RAW timelapse!
Programs used:- Adobe Bridge, Quicktime Player 7 (I found myself needing to download Photoshop for Bridge to work)
CAMERA SETTINGS (CANON 550D):-
MANUAL MODE
F22
ISO 200
1/50
RAW
Using an intervalometer I set the camera to take 1 photo every 2 seconds for 30minutes. (This suits fast moving clouds)
Lens - Canon 20mm f2.8
WORKFLOW:-
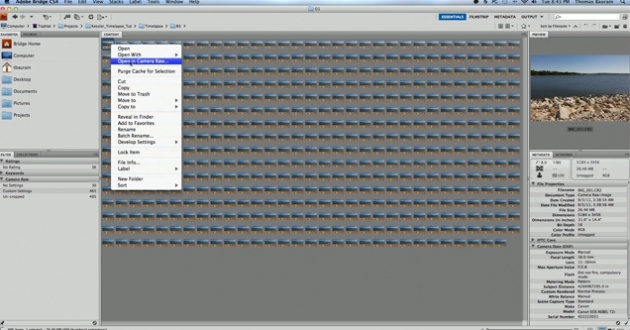
Open images in BRIDGE
Right click 1st image
Select "OPEN IN CAMERA RAW"
Manipulate image to suit requirement - Vibrancy, contrast, brightness etc
Once finished click DONE
You will want to paste your new picture settings to the rest of your images.
Right click same image
"DEVELOP SETTINGS"
"COPY SETTINGS"
Highlight rest of the clips
Right click and "PASTE SETTINGS"
As the photos are in RAW format (.CR2) they will need to be converted to .JPEG before assembling them in a timelapse. This can be done in BRIDGE also.
Highlight and open all images in "CAMERA RAW"
"SELECT ALL" (Found in the left tab)
"SAVE AS JPEG"
Depending on how many photos have been taken this is a great opportunity to mow the lawn, make dinner, take a shower etc
……………….
Once the conversion has completed you are ready to get the time-lapse in motion!
Open QuickTime Player 7
Click "FILE"
"OPEN IMAGE SEQUENCE"
(Latest versions of Quicktime won't have this option but you can download Quicktime Player 7 for free)
Click 1st image, "OPEN"
Choose frame rate (I chose 30fps - Trial and Error it if you're not sure)
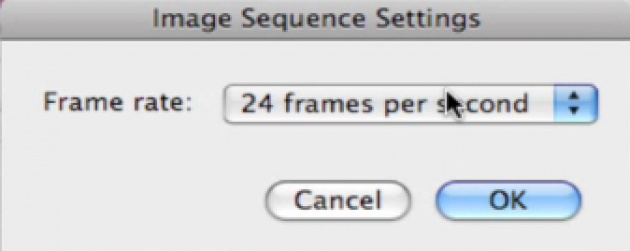
Click "OK"
Click "VIEW" on the top menu
"FIT TO SCREEN"
"FILE" - "EXPORT" - "QUICKTIME MOVIE"
Select "OPTIONS"
Compression – H.264
Key Frame Rate (Matching what you selected previously - so in my case 30fps)
Whack the quality up to BEST
"SIZE" – I selected 1920 x 1080 as I didn't want to key frame any movement. If you do want to have slight zooms or pans you should select CURRENT SIZE which will maintain quality (*Be warned* STRESS/PATIENCE LEVELS MAY RISE)
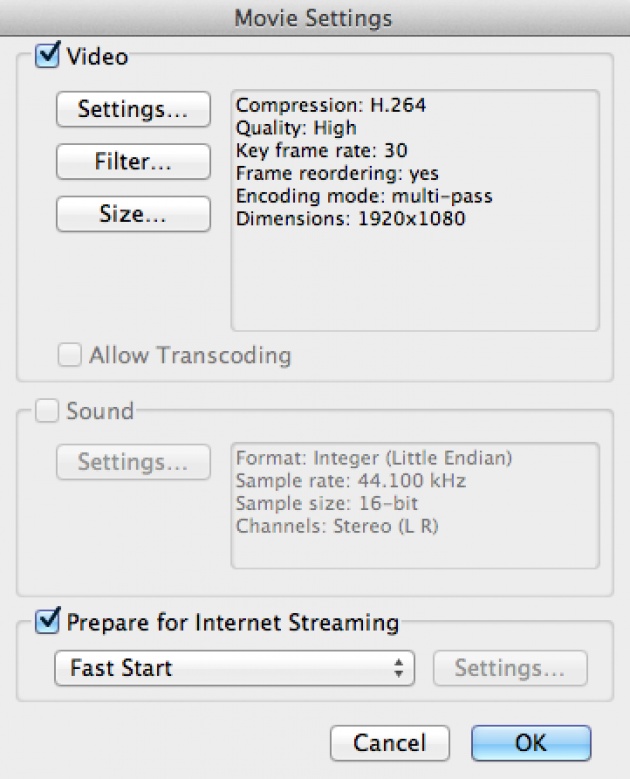
Click OK.
Hopefully you should have a nice looking timelapse!
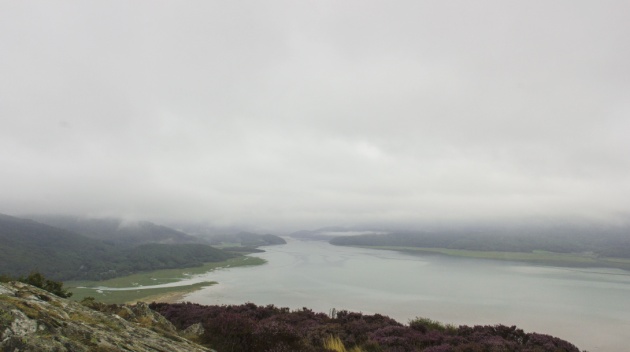
My outcome has some slight noise that I need to look into further, will keep you updated!!
Pretty new to this myself so there may be something I can change to improve the time-lapse...if you know what, share :)
Peace and Love