Windows 10’s Start menu is a melding of two worlds: With it, Microsoft is attempting to bring the best of the classic Start menu together with the best of the Windows 8 Start screen. Whether Microsoft pulled it off is a topic for debate, but you do have some control of what appears in the new Start menu.
Add, rearrange, and resize live tiles
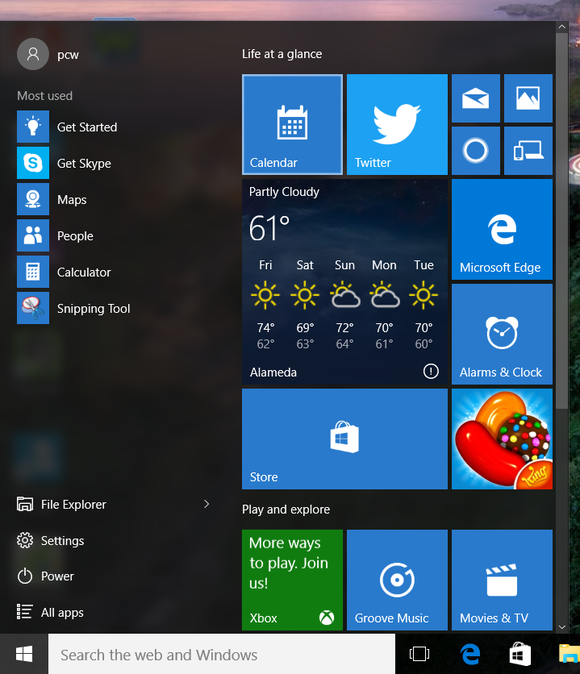
Windows 10 comes with a default set of live tiles in the Start menu—those large icons that populate the right-hand side of the Start menu—such as the Weather, Calendar, Mail, and Photos apps, as well as the Edge browser. But you can add just about any app to the live tiles pane.
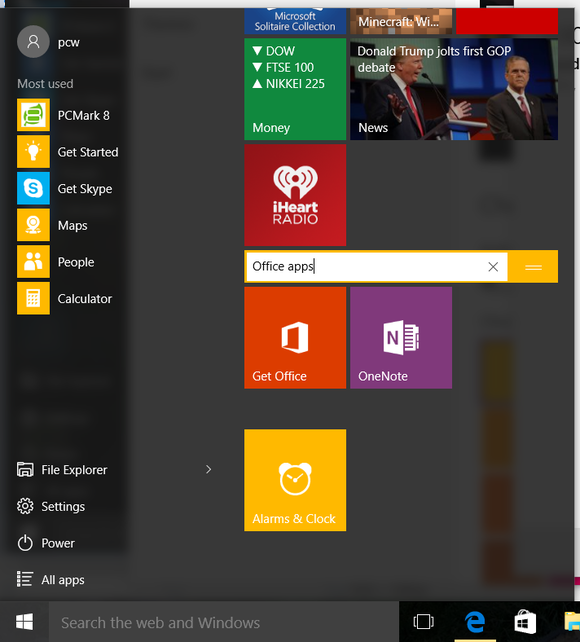
Pop open the Start menu, then click All apps. Find the app you want to pin to the Start menu; right-click it, then select Pin to Start. That app’s icon will now appear at the bottom of the live tiles pane.
If you want to remove a live tile from the Start menu, simply right-click the icon in question, then select Unpin from Start.
The right-click menu also lets you resize live tiles: Mouse over the Resize menu item, then select the size you want. You can choose between four different sizes: Small (a tiny version of the live tile), Medium (The default size for most live tiles) Wide (twice as wide as a Medium live tile), and Large (twice as tall as the Wide size).
Once you pin the apps you want, simply drag and drop live tiles around the Start menu until you find the arrangement you like.
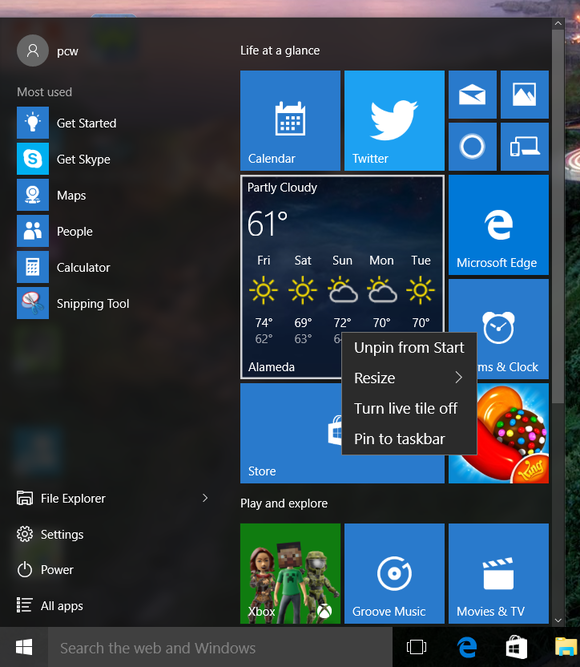
Not every app takes full advantage of live tiles, so you won’t necessarily get at-a-glance information from every icon in the live tiles pane, but at the very least, it’ll provide quick access to the apps you use the most. If an app’s live tile updates are getting in your way, you can always turn off that app’s live tile by right-clicking it and selecting Turn live tile off.
Unfortunately, with Windows 10, you can’t rearrange the items in the Start menu’s left-hand column as you can with the live tiles: Windows 10 uses this space to automatically show the apps you use the most.
Group your live tiles
You can also group your live tiles as you please. You can create a group for games, for example, or one for productivity apps, communication apps, design apps...it’s up to you.
To create a new group, click and drag a live tile to an empty space in the Start menu’s live tile pane until a horizontal bar appears (the bar’s color will vary depending on your accent color). Once the bar appears, release the mouse button, and Windows will create a new group containing that app.
You can name your groups, too. Mouse over the empty space above each group, then click Name group once the text appears. Give the group a name, then press the Enter key. While you’re at it, go ahead and rearrange your groups by dragging the drag thumb that appears (look for the two horizontal lines that appear near the right-hand edge of the group's name bar).
Resize the Start menu
Now that you have your Start menu arranged just the way you want it, why not resize it? Mouse over either the top or right-hand edge of the Start menu until the resize pointer appears, then click and drag to resize it, just as you would resize a window. The Start menu doesn’t take up the entire screen by default, but if you’re feeling nostalgic for the old days of Windows 8, you can easily change that.
Pop open the Settings app, select Personalization, then select Start from the left-hand column. Next toggle the “Use Start full screen” switch to the on position. The next time you open the Start menu, it’ll take up the entire screen, save for the taskbar at the bottom.
Other tricks
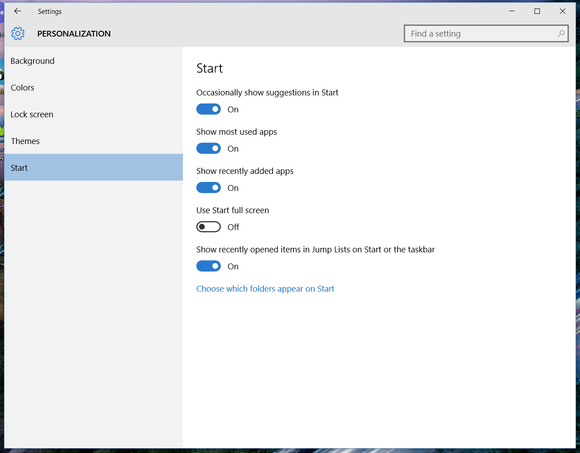
Windows 10 has a few other options for the Start menu that we won’t cover exhaustively here, such as the ability to hide the “Most used” section and to pick which folders you can access via the Start menu. To get to these, open the Settings app, then go to Personalization > Start. Play around with the various options and get a feel for what works best for you.