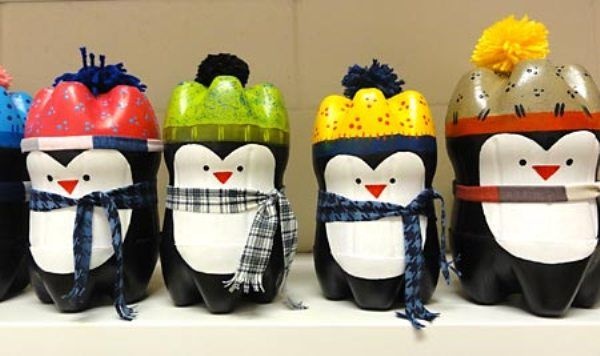
This penguin figurine are charming, friendly and they have a natural design. So just put all your materials together and lets start our next project:
You will need the following materials:
– 2 plastic bottles the same size
– hot glue
– acrylic paints in white, black and colored
– bright acrylic varnish
– primer for pet
– black CD marker
– piece of wool and piece of fabric with good drape
Follow our instructions:
Wash the bottles inside and out and drain the water. The bottles must be completely dry. Cut the first bottle separating the bottom. Cut the second bottle in half. Use only these two parts of the bottles.
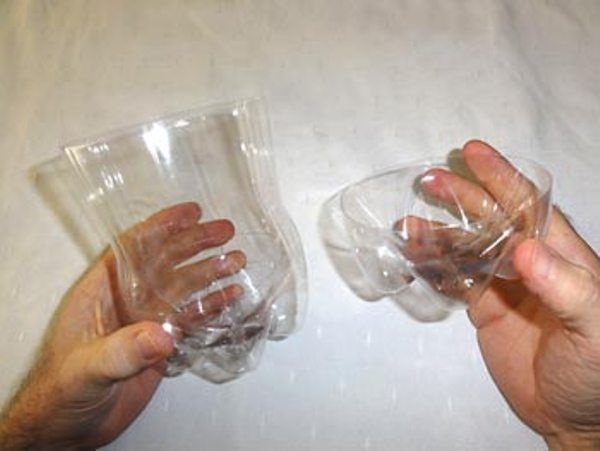
Attach the two plastic part together. The larger part must fit in the smaller part, more or less 0.5 to 1 inch. Once attached, press the bigger part down and put a drop of hot glue between the parties. Put the hot glue in four places more or less opposite to each other. Be careful that the glue it is not that hot, not to deform the plastic. Spend a thin coat of primer and spread it very well. It dries very quickly. The primer serves to give greater ink adhesion on the plastic bottle. Draw the belly of the penguin on a sheet of paper or cardboard and cut out to make the mold. Pass the drawing for the body with the black CD marker. Paint the belly with white paint, and be careful not to smudge the outline in black.Spend 2-3 coats if necessary.

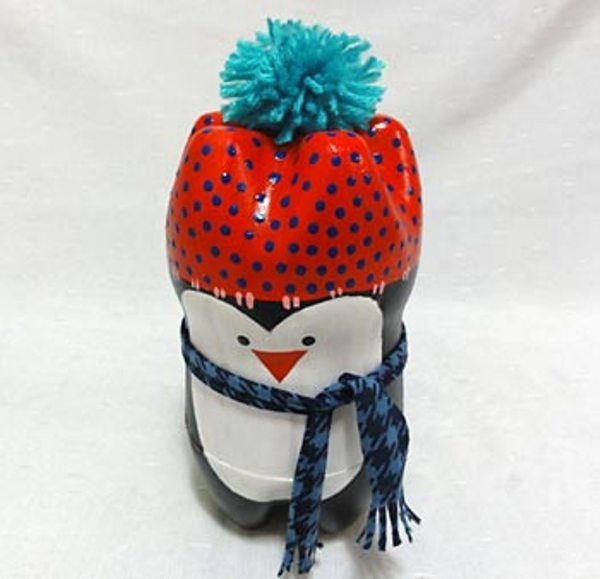
Paint the body and feet of the penguin in black. Let it dry. If necessary, reinforce the contour of the belly with the mold again. Choose your favorite color and paint the penguin hat. Use your imagination and creativity and decorate the hat. Now paint the eyes. One tip is to brush the cable. Paint also the mouth. If you do not have firm details to paint, draw a triangle on a red paper, cut and paste with white glue.

After all the paint is dry, put a coat of acrylic varnish bright throughout the penguin. The pom pom is optional. To do this, wrap on two fingers a few laps of wool. The more you turn the wool the more full and beautiful will be. You can also use a fork instead of fingers, if you prefer. Remove the fingers carefully and put a piece of wool in the middle. Cut the two sides with scissors, to loosen the wires pompom.
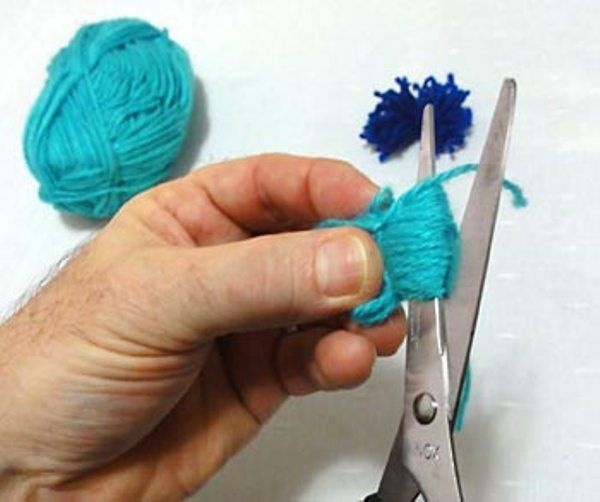
Your pom pom is ready. If you use those wool and make the pom pom really “fluffy”, they are really cool. Glue the pom pom’s on the top of the penguin, on the head with hot glue. Take a strip of fabric, wrap it around the penguin neck and tie a knot to make the scarf. Use “mesh” or other fabric of your choice that has a good fit. Cut the ends making fringes, to make the scarf even more charming. Your beautiful penguin is ready. Isn’t it awesome?