From the last blog post, I described the modelling and sculpting process of the main character of "Uyir". In this post, I'll detail the rigging and clothing of the old man character.
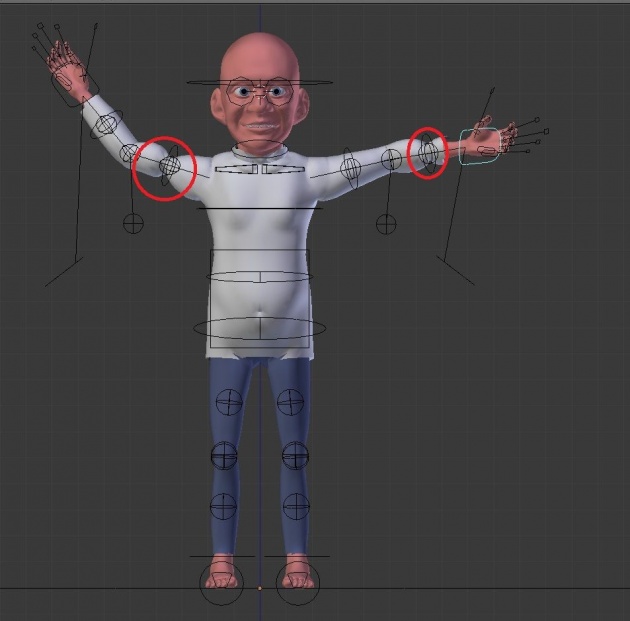
The process of rigging is one of the most daunting tasks of CG. The process tends to be tedious, quite boring and at times challenging. Rigging involves preparing the 3D character for animation. A skeletal structure made up of bones is used to define the underlying bone structure for the character and give the animator the option to pose and control the characters movement. I have never rigged a character on my own before. Well, not properly, at least. I didn't know how to set up IK/FK bones and switches (didn't really know what they were at the time), constraints and all that other stuff. Luckily, Blender has made this process FAR easier. Blender already has a built-in plugin called "Rigify" (thanks to Nathan Vegdahl) that allows you to rig characters in a breeze. Rigify gives you a generic human rig. You then match each of the bones, make them bigger/smaller depending on your character model and then you simply press the 'Generate' button. The generated rig comes loaded with IK/FK constraints, squash and stretch features as well as a number of other handy tools which makes the animators life MUCH easier. The animator doesn't even have to know how the rig was built, since all the hard work is done. Animators can just go in and use it. The rig at times can make mistakes with the weight painting (as shown in the second image below, where the arm would pinch or create strange artifacts), and this is where I had to go in and fix it up.
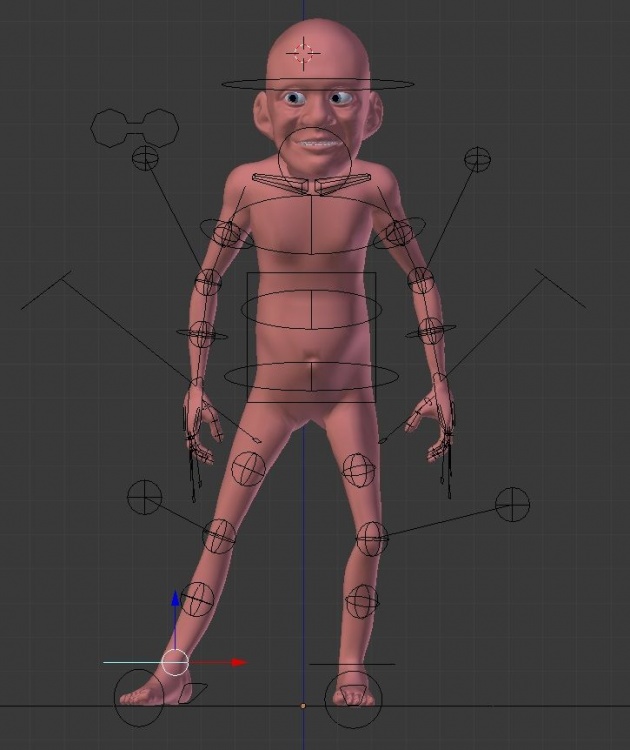
As of now, there is no face rig with the tool. This is where I had to go in and modify the rig and build my own face rig. The first image above is my fully rigged character posed and looking alive.
To test whether it all deforms properly, I re-used a walk cycle from my recent short film "Vetri" and applied it to this character. The animation itself doesn't look good, but I'm more interested in seeing if there's no strange deformations.
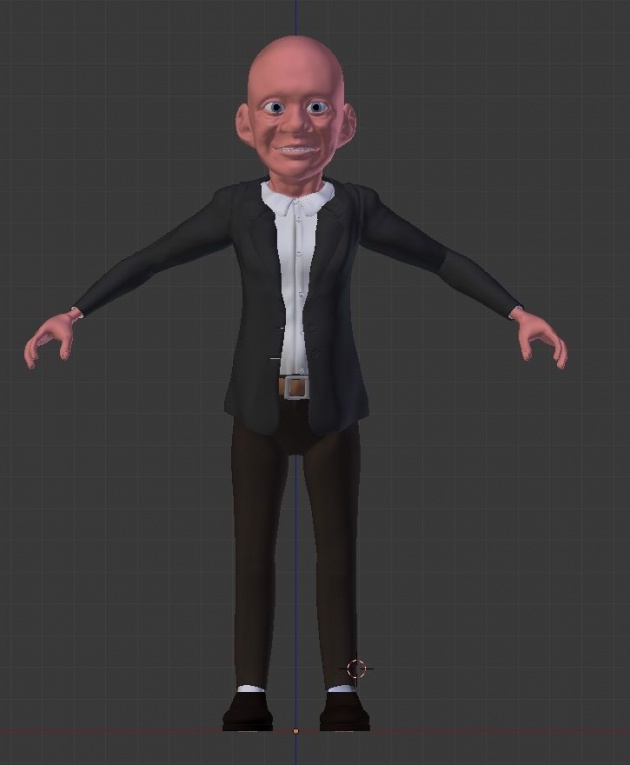
It was then time to move onto the clothing. This process was easy but required a bit of patience. To make each of the clothing, I duplicated the model (while rigged) and deleted the parts of the mesh that weren't necessary. For instance, for the jacket mesh, I deleted his legs, head and neck, thus leaving only the body and arms intact. I then inflated the duplicated mesh. By now, it would look like a shirt. I would then go about bringing my artistic eye into play and mould out a jacket. I would then add extra items like a collar and buttons. I would do this for the shirt and pants. I don't have to rig all the clothing items to the character since it was rigged all along (I just duplicated the already rigged model). The shoes were modelled and rigged separately.
He's still looking alien-like, but I promise he will start looking human-like very soon. Since I'm going for a stylistic character (like in Pixar's "Up", "Tangled" or "Tintin"), I don't mind it looking too exaggerated. It can help lend more appeal to the film.
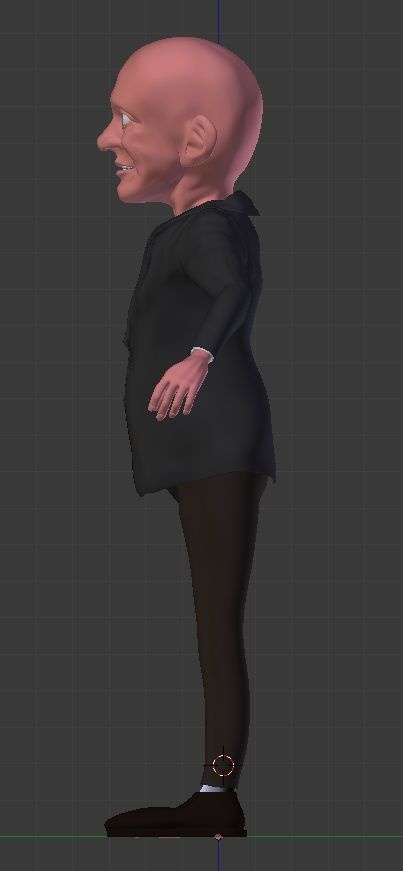
Again, I tested to see if the clothes deform properly using the same walk cycle from "Vetri".
Cool! No deformation issues. In fact, there are still some minor deformation issues, but it's the best I could muster and I guess I'll stick to this as it doesn't look too embarassing. At this point, I was ready to move on to texturing and shading the character. This process took a while and will need some explaining so I will detail this in the next post!