Edited using PixTeller
Image Credit: Artbytes via Bitlanders
This is my second post about Pixteller. My first was "Let Your Pix Tell Your Stories". In this post I will share with you the basics of this amazing web-based graphic design app and why I love Pixteller.
In case you have not read my previous post about PixTeller yet, here's a short video about it.
Video Credit: Alexondru Roznovat via YouTube
Again to refresh you about what Pixteller is;
PixTeller is an easy-to-use graphic design tool you can use to create or customize any image in seconds.
Design engaging images, social media covers, banners, digital ads, print materials or any other design in seconds.
At the moment, I still have not fully explored all the features of Pixteller. Since I got my life-time Pro-account for free from a raffle of Mostlyblogging.com, I have to explore the app from a free account. Nevertheless, even the free account is more than enough to create stunning web graphics quickly. Not only that you can also create designs for print.
Review and Tutorial
This post is my review of Pixteller and an exploratory tutorial. I will share with the basic components and tools of the site and how to use them. Currently I am using Pixteller via Chrome on an Android Tablet with 10.1" screen. I checked the "Desktop View" so I can use the app on both portrait and landscape orientation. The app will not work on portrait mode if the Desktop View is turned off.
Exploring Pixteller
First go to Pixteller.com website. You will be greeted with their landing page where you can start designing right away. I however, registered a free account by clicking on the button on the upper right corner of the screen.
Creating A Free Account in PixTeller
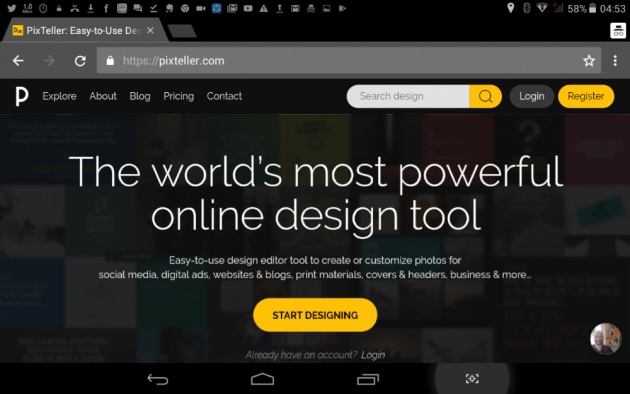
Pixteller landing page
Image Credit: @Artbytes Via Bitlanders
You have three options in creating your account:
- Using your Facebook account;
- Your Google account; or
- You can create a new user name linked to your email.
I used my Google account.
Creating First Design
After creating my account and logged in, I was brought to the "Create First Design" page directly. After clicking (or tapping) on the "Create" button, the next screen will ask you "What do you want to create?". Also in that screen are the recommended options:
- Social Media Posts
- Poster
- Card
- A4 Poster
- A4 Presentation
- Facebook Cover
Or you can explore the categories beside the recommended tab. These are:
- Social Media
- Cover & Header
- Marketing & Events
- Banners
- Prints
- All (will show you all the options)
Or you can "create from scratch" (scroll down to see the button")
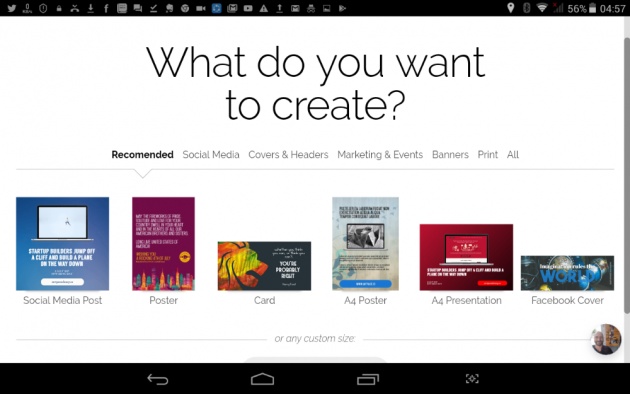
Create First Design and design Options
Image Credit: @Artbytes Via Bitlanders
Select any size or template for now. In this example however, I used an Instagram Square template.
Short Tutorial (5 Steps to Easily Design in Pixteller)
If this is the first time you used Pixteller, a 5-Step tutorial will pop-up. The tutorial describes the design and editorial tools that you can use in Pixteller

Introduction for the tutorial
Image Credit: @Artbytes Via Bitlanders
You can choose to skip the tutorial or go on with it.
Design Properties
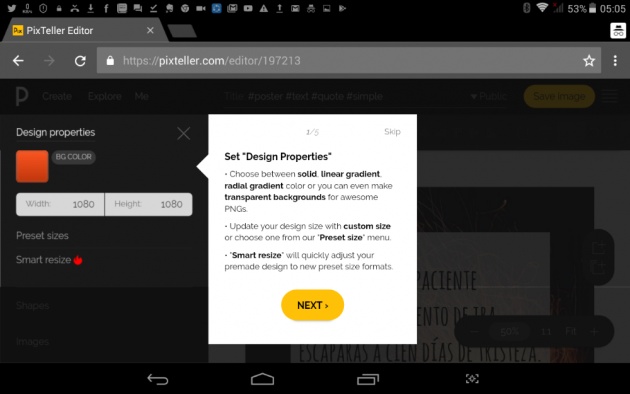
Design Properties
Image Credit: @Artbytes Via Bitlanders
In design properties, you can change the background color and the size of the canvass. For the colors, you can use solid, gradient or even transparent color.
For the sizes, you can use any of the preset sizes or you can customize the size.
Elements in Pixteller
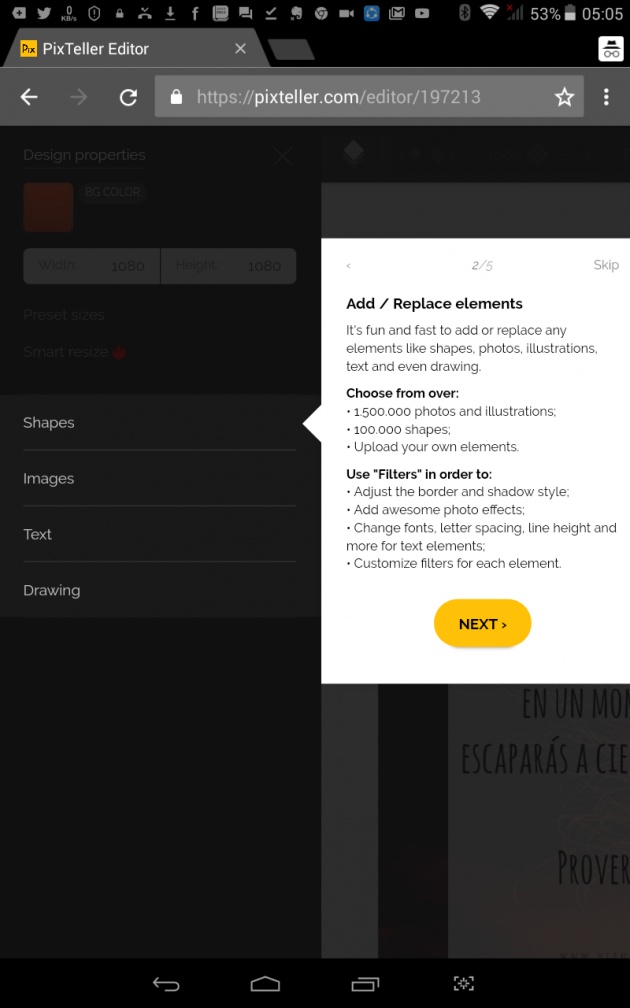
Elements in Pixteller
Image Credit: @Artbytes Via Bitlanders
In Pixteller you can use the following elements or objects.
- Shapes
- Image
- Text
Drawing
Yes, you can create a simple drawing in Pixteller. Which I find amazing.
You can add any of these elements in your design or 'Replace' an existing one. You can choose from the existing 1,500,000 photos and illustrations and 100,000 free shapes.
Filters
Each element type have filters. Some of the common filters are:
- Border
- Shadow
- Skew
- Blur
- Brightness
- Hugh/Saturation/Lightness
- Noise
- Pixelate
- RGB
My favorite filter so far is the the Shadow or Drop Shadow in other applications.
Top Menu
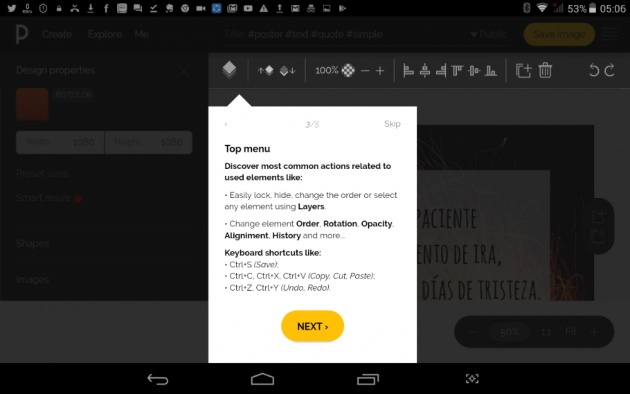
Top Menu
Image Credit: @Artbytes Via Bitlanders
The Top Menu contains the most common actions that you can apply on each element:
- Layers - each element is placed on different layers. You can change the order of the elements.
- Opacity - you can adjust the Opacity or transparency of each element.
- Rotation and alignment - the alignment and rotation can be easily adjusted using this menu.
- Delete - This is used to delete an element from your canvass.
- Undo/Redo - The common keyboard shortcuts CTRL-Z and CTRL-Y applies also.
Multiple Page Menu
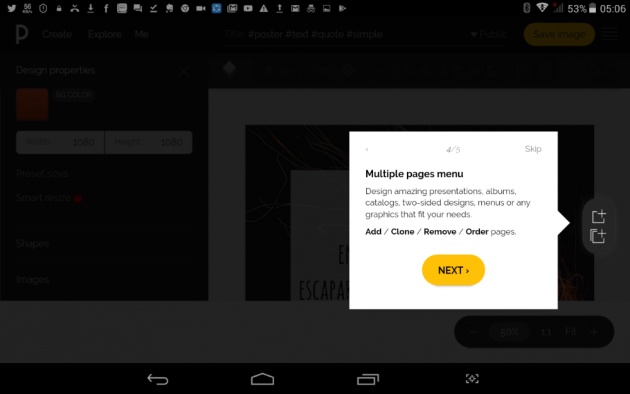
Multiple Page Menu
Image Credit: @Artbytes Via Bitlanders
With the Multiple Page Menu, you can create presentations, or a multiple-page flyers, or any design that requires multiple pages. Each page is saved as a separate image.
Final Step
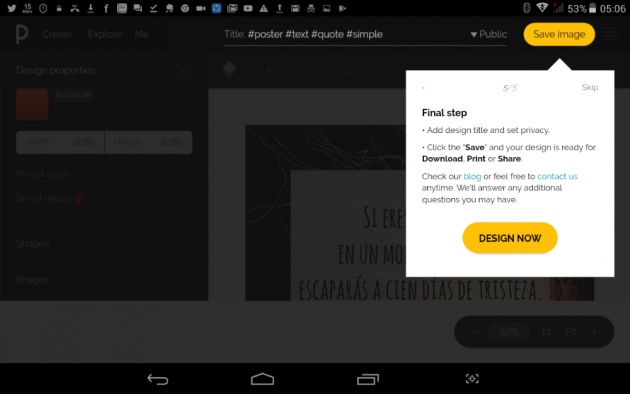
Add title and Save
Image Credit: @Artbytes Via Bitlanders
The last and final step of course, is to add title to your design and save. All your designs and are saved on the Pixteller cloud storage. You can then edit the design later or download them in any of the following file formats: PNG, JPG, GIF of PDF.
For free users, all designs are saved as Public files. Premium users have the option to save their design as Private.
Why I love Pixteller.
Pixteller is trully an amazing web-graphics application, and the best alternative for Canva. The site runs relatively smoothly even on a 1 Mbps DSL connection.
Here are some of the features that I love about Pixteller.
Runs on an Android Tablet
The graphic design web application runs even on my Android Tablet. Yes, I can use the app directly on their website without having to download an Android app.
Extensive collection of free images and shapes
Pixteller offers 1.5 Million free photos and illustrations even for the free accounts. Still, if you can't find the perfect picture, or you need to use of your photo or illustration, you can upload your own.
Hundreds of Fonts
Pixteller have hundreds of fonts to choose from. To make the selecting process a bit easier, you can either search for a specific font name, or you can group the fonts by the following:
- Serif
- SanSerif
- MonoSpace
- HandWriting
- Display
If you can't find the font the want to use, you can download the font from the web and upload it on Pixteller.
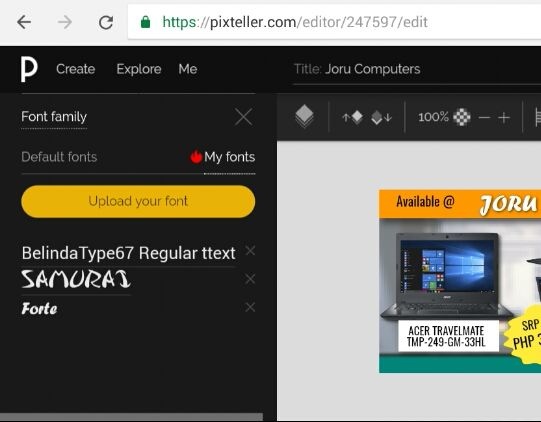
You can upload your own fonts
Image Credit: @Artbytes Via Bitlanders
Filters and Effects
Perhaps one of the best features of Pixtellers is the Filters and Effects. With this feature, you can adjust the brightness and contrast, the hue, saturation and other aspects of an object. As I have mentioned above, my favorite effect is the Shadow.
These are just some of the reasons why I love Pixteller. There are other features that I am still exploring at this time. While I use my tablet most of the time, there are some features that are much easier to use on a Windows Desktop (and bigger screen).
More Tutorials Coming Soon
I will create simple tutorials on how to create awesime graphic designs using Pixteller in the future. For the meantime, here is a video I created showing how I used Pixteller to make a design for a mug.
Video Credit: JLCreativeIdeas Via YouTube
I made some changes after I made the video though. Thus the final output is different. Nevertheless, I hope I piqued your interest in using Pixteller.
Thanks For Reading
~oO0Oo~
John Reynold Loberiza (a.k.a @artbytes) is a freelance graphic artist, web developer, and blogger. He is also a licensed Financial Advisor under Insular Life.
The content of this blog post is the author's original work. Proper credit is always given to the respective sources of information and images. Please feel free to check out my other blog posts: http://www.bitlanders.com/Artbytes/blog_post
If you have any reactions or inquiries regarding the subject of this post, please write it in the comment or send the author a private message.
If you have a reaction or want more information or you have some questions regarding this post, feel free to post a comment below. You can also:
Visit my personal blog: https://jrlcentral.xyz
Follow me on Twitter: http://www.twitter.com/jrlcentral
or email me: jrcreativeideas@gmail.com
~oO0Oo~
JOIN BITLANDERS
If you are not a member of bitLanders yet, you can join bitLanders and start earning from your contents by clicking this link: http://bit.ly/Join_bitlanders